 Search
 Account
 Discord


- Slugfest 01
- Slugfest 02
- Slugfest 03
- Slugfest 04
- Slugfest 05
- Slugfest 06
- Slugfest 07
Brawl Stars The Smackdome is a fast-paced community-created map featured in the Brawl Arena event. Designed for intense, close-quarters combat, it encourages aggressive plays, quick eliminations, and constant movement. With its tight layout and high action zones, it’s a favorite for players who enjoy nonstop brawling and clutch team fights.
Brawl Stars The Smackdome Guide: Map Layout
| Mid Lane (Arena XP Zone) |
|---|
 The center of Smackdome is where robot waves spawn and where most battles take place. This zone is the main source of Arena XP, making it a constant hotspot for skirmishes. It features scattered cover and bushes that allow for quick ambushes and repositioning during intense fights. |
| Jungle Flanks |
|---|
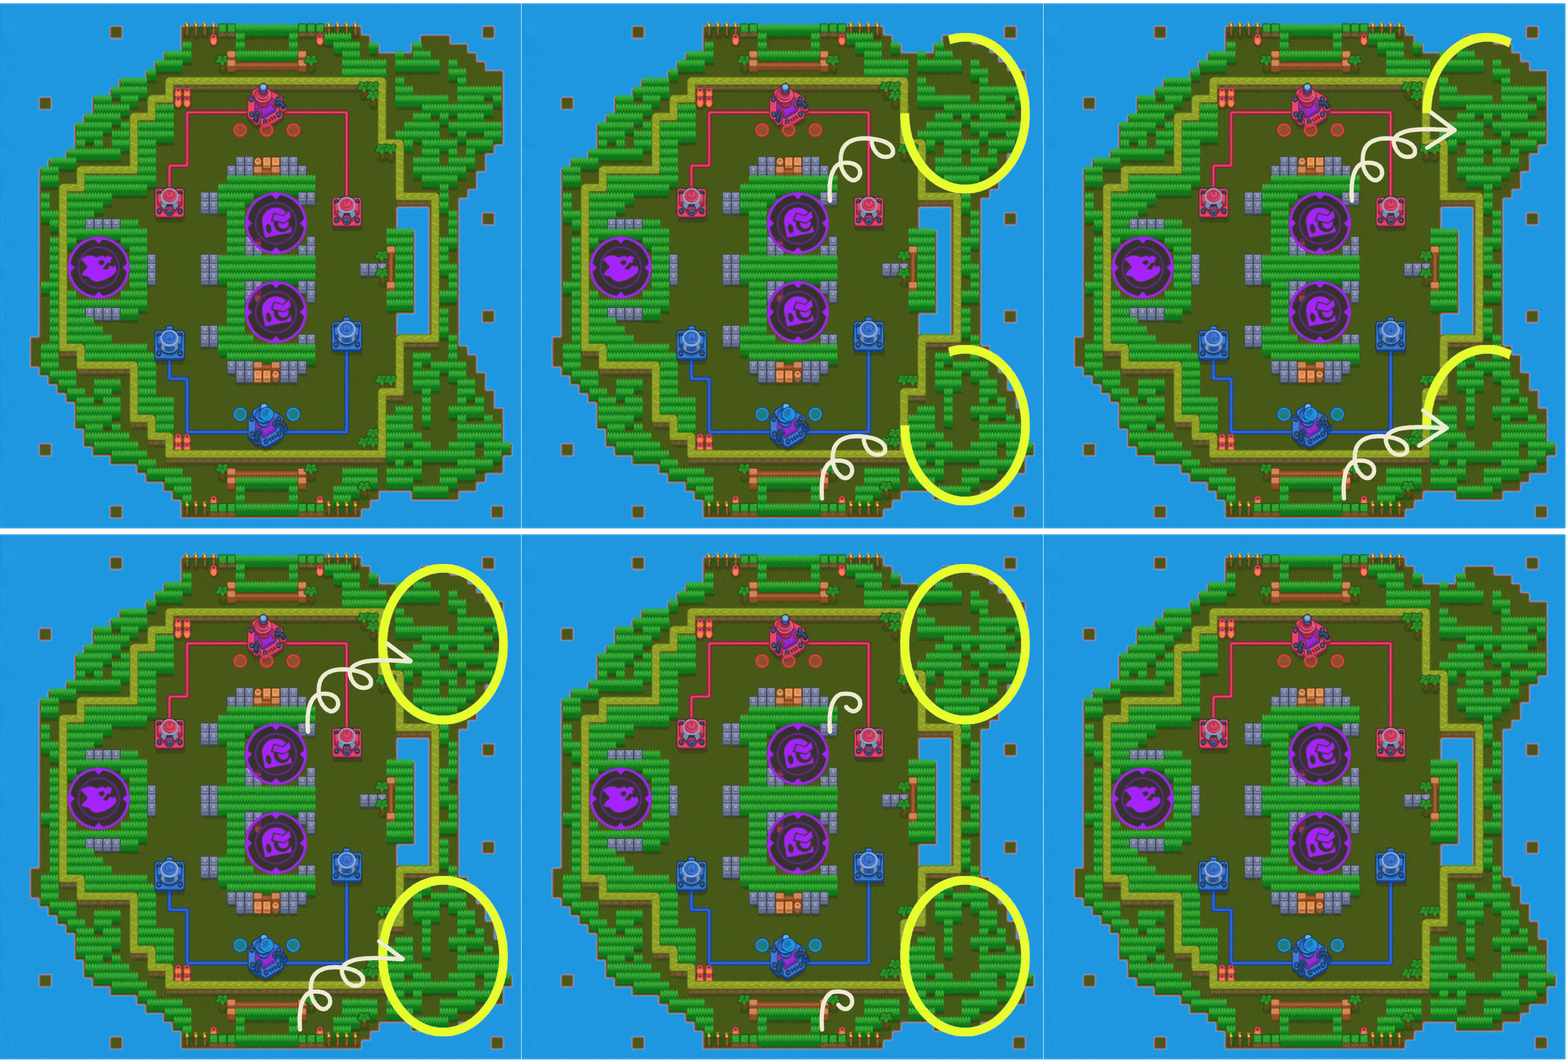 On both sides of the Brawl Stars The Smackdome map, dense bushes and narrow paths create perfect flanking routes. These jungle lanes are ideal for stealthy Brawlers who excel at ambushing opponents or slipping behind enemy lines to pressure turrets and disrupt XP collection. |
| Side Turret Zones |
|---|
 Each team has two defensive turrets positioned between the jungle flanks and the base. These turrets cannot be targeted until an enemy enters their range, creating a layer of defense that must be carefully dismantled. The surrounding terrain provides minimal cover, making turret pushes risky without proper coordination. |
| Team Bases |
|---|
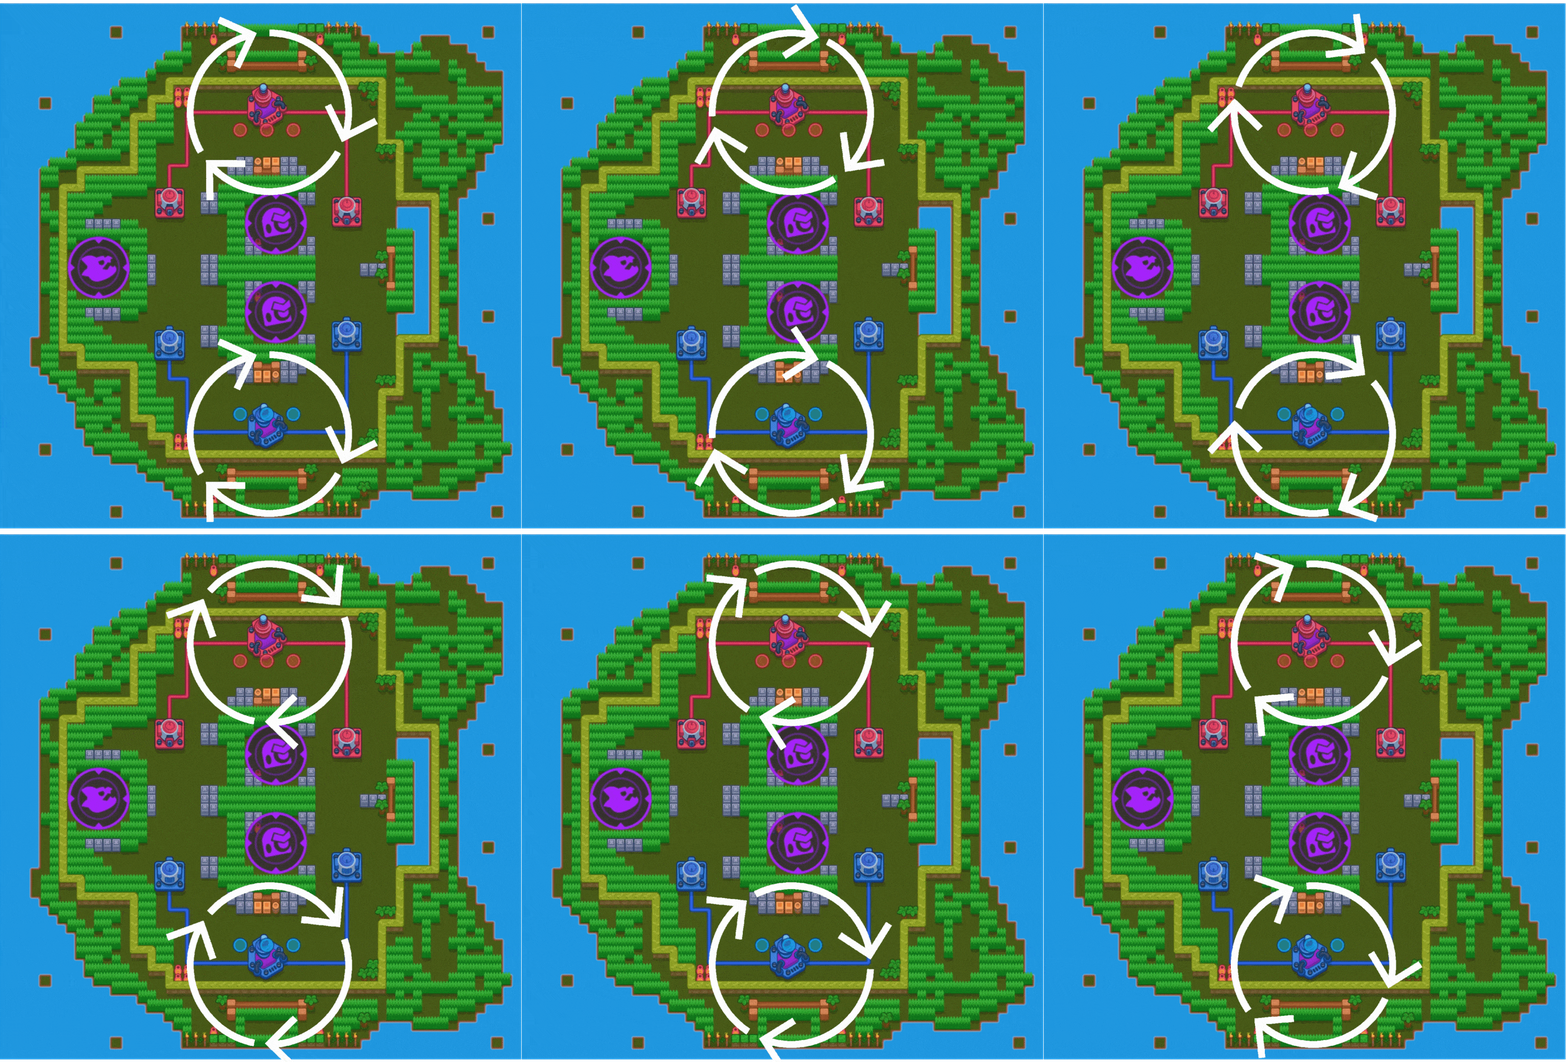 Located deep in each team’s territory, the bases are well-protected and act as the final target. They are capable of attacking nearby enemies and spawning minions to aid in defense. Bases only become vulnerable once both turrets are destroyed, adding an extra challenge before securing victory. |
| Arena Chokepoints |
|---|
 Tight corridors between the mid lane and turret areas serve as natural chokepoints. These spots often become crowded with brawlers clashing for control, making them perfect for area denial tools and high-damage abilities. Timing and positioning in these zones can quickly shift the momentum of a match. |
Brawl Stars The Smackdome Guide: Best Brawlers
| Brawler | Why They’re Effective |
|---|---|
 Shade | Excellent splash damage, fast Super cycling, and great at controlling bots and enemies in tight spaces. |
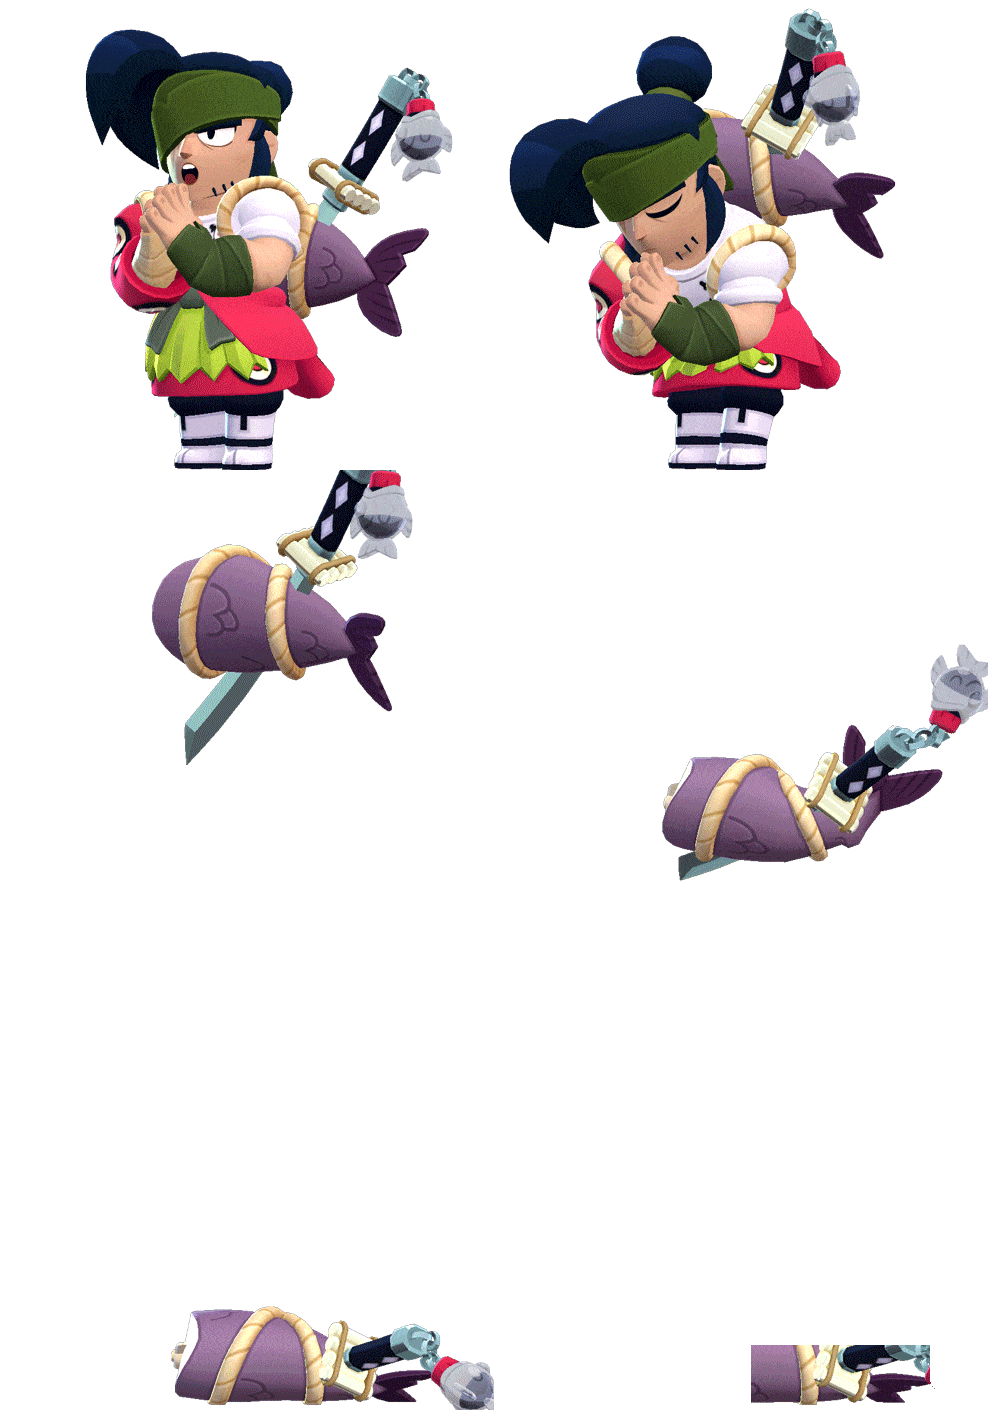 Kenji | High survivability and scaling damage make him perfect for extended fights and collecting Arena XP. |
 Edgar | Constant Super uptime from bots lets him pressure enemies and escape easily; strong vs squishier Brawlers. |
 Lumi | Great area control and burst damage; her Super and Gadgets can shut down tower pushes and clustered fights. |
 Ash | Excels in chaos with bots feeding his Rage; strong turret damage and useful against tanks and ambushers. |
 Jacky | Tanky jungler that dominates in bushes; great for XP ambushes and base pressure with Counter Crush. |
 Tara | Strong area denial and bush control; piercing attacks and Super can dismantle grouped enemies. |
 Buzz | Near-constant stuns thanks to bots; thrives in tight jungle paths and chokepoints. |
 Mandy | Long-range control and powerful Super for wiping teams and pressuring towers from a distance. |
 Cordelius | Excellent for isolating threats with his Super and charging it off bots; shuts down tanks and assassins. |
 Amber | High DPS and great zone control with fire trails; effective against bots, towers, and grouped enemies. |
 Carl | Piercing attacks and fast Super are great for damage and map rotations; strong against both bots and turrets. |
Brawl Stars The Smackdome Guide: Tips
Brawl Stars The Smackdome is a fast-paced Brawl Arena map where strategic positioning and XP control can make or break your team’s chances. Here are some key tips to help you navigate its jungle flanks, chokepoints, and high-risk zones for victory.
Control the Mid Lane for XP
The center of the map is the main source of Arena XP. Holding this zone gives your team a stat advantage. Use cover and bushes for ambushes.
Use the Jungle for Flanks
The jungle flanks are filled with bushes and narrow lanes. These are ideal for sneaky Brawlers to ambush enemies or pressure enemy towers from the side.
Push Turrets When They’re Active
Enemy turrets are only vulnerable when someone enters their range. Use minions or teammates to trigger them and push together to avoid wasted damage.
Target Either Turret
The turrets share health, so damage to one weakens both. Focus on whichever is less defended to break through faster and pressure the enemy base.
Secure Your Side of the Jungle
Controlling your flank helps prevent enemy ambushes and XP steals. It also allows you to rotate mid and towers more safely.
Hold Chokepoints with Area Control
The tight corridors between mid and turret zones are natural chokepoints. Brawlers with splash or control supers can dominate these spaces.
Don’t Rush the Base Too Early
Focus on taking down both turrets before diving into the enemy base. Base damage won’t matter if turrets remain active and punishing.
Watch Bushes for Hidden Enemies
If Arena XP shifts to an unseen enemy after a teammate falls, it likely means someone is hiding in a bush nearby—prepare for a follow-up fight.
Brawl Stars The Smackdome Guide: Conclusion
Brawl Stars The Smackdome is a chaotic yet strategic battlefield where every zone—from the XP-packed mid lane to the flanking jungle paths—demands awareness and teamwork. Knowing when to push turrets, secure choke points, and manage Arena XP can turn the tide of any match. Whether you’re locking down control or staging a comeback, adapting to the layout of Smackdome is key to mastering Brawl Arena and securing consistent victories.
Frequently Asked Questions (F.AQ)
What’s the most important part of Smackdome to control early?
The mid lane is the most critical area early on since it spawns robots that drop Arena XP. Controlling it gives your team a strong stat lead.
Why are the jungle flanks important?
The flanks offer paths for stealth attacks and turret pressure. They’re ideal for ambush Brawlers and can shift the match if left unchecked.
Can I attack the base before the turrets are destroyed?
No, the base is invulnerable until both side turrets are taken down. Focus on destroying them first to open up the path to victory.
What are chokepoints and how should I play around them?
Chokepoints are narrow lanes near the turrets. Use splash damage or control abilities to dominate these areas and prevent enemy rotations.
Should I chase enemies into their base?
Not usually. The base can defend itself and spawn minions. If the turrets are still up, you risk feeding the enemy XP—push together as a team instead.

