 Search
 Account
 Discord


- Bazaar 01
- Bazaar 02
- Bazaar Block – 66
- Bazaar Barrel – 4
- Sandstone Fence – 12
- Bazaar Pot – 16
- Bush – 84
Brawl Stars Traffic Jam is a player-created community map featured in the Heist event. Designed with tight choke points and a lane-based layout, this map simulates the feel of weaving through a congested battlefield—much like a real traffic jam. With walls and narrow passages guiding player movement, it promotes coordinated team pushes and calculated defensive stands. The map rewards both lane control and flanking, making it a great stage for Brawlers that excel in mid-to-close range combat and fast-paced pressure.
Brawl Stars Traffic Jam Guide: Map Layout
Brawl Stars Traffic Jam is a map featuring tight center paths, open side lanes, and corner-placed safes. Its design forces players to choose between aggressive flanks or methodical, wall-supported advances through mid.
| Safe Locations |
|---|
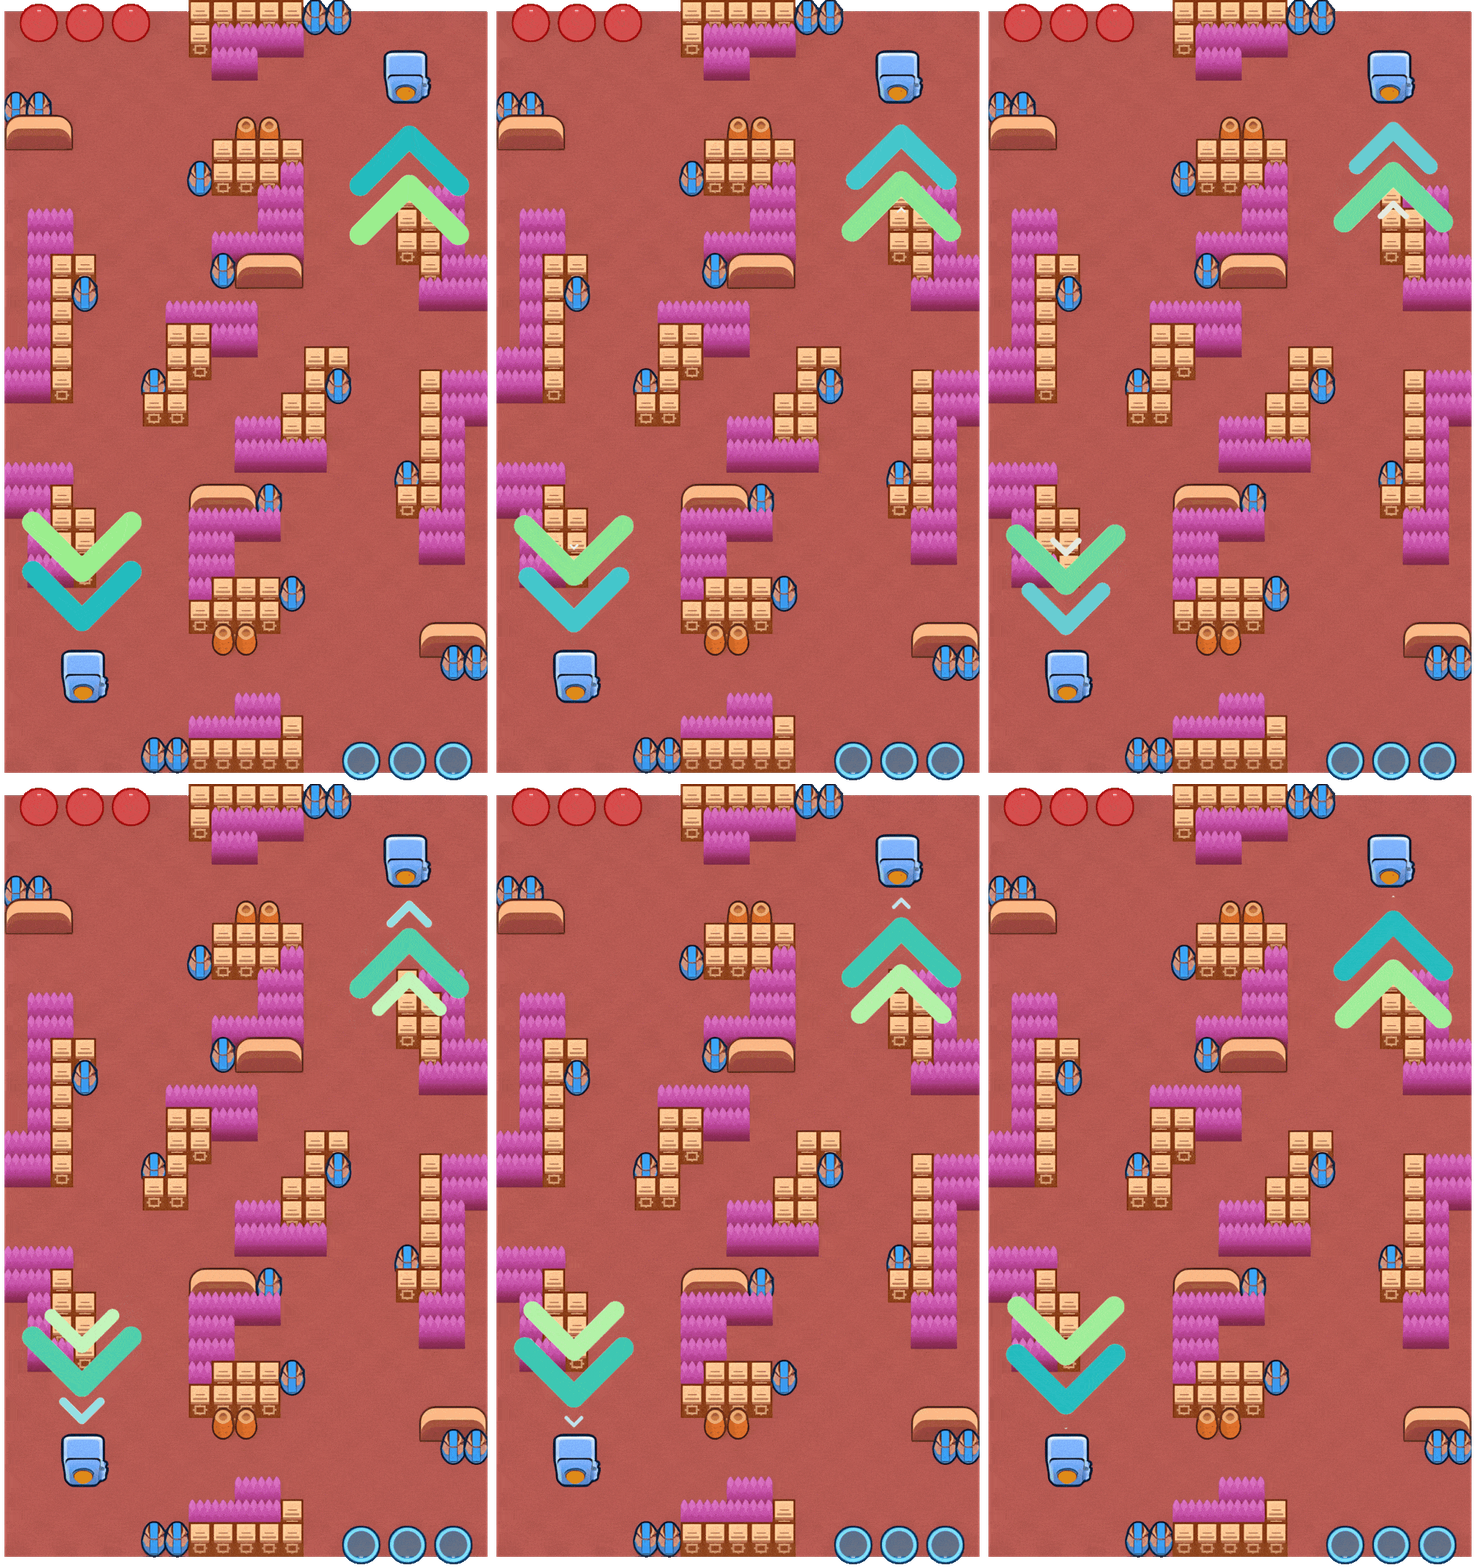 Each team’s safe is placed in opposite corners—bottom left and top right—requiring diagonal traversal for direct attacks. |
| Spawn Points |
|---|
 Players spawn behind fences opposite their own safe, giving time to reposition and defend before the fight reaches their zone. |
| Side Lanes |
|---|
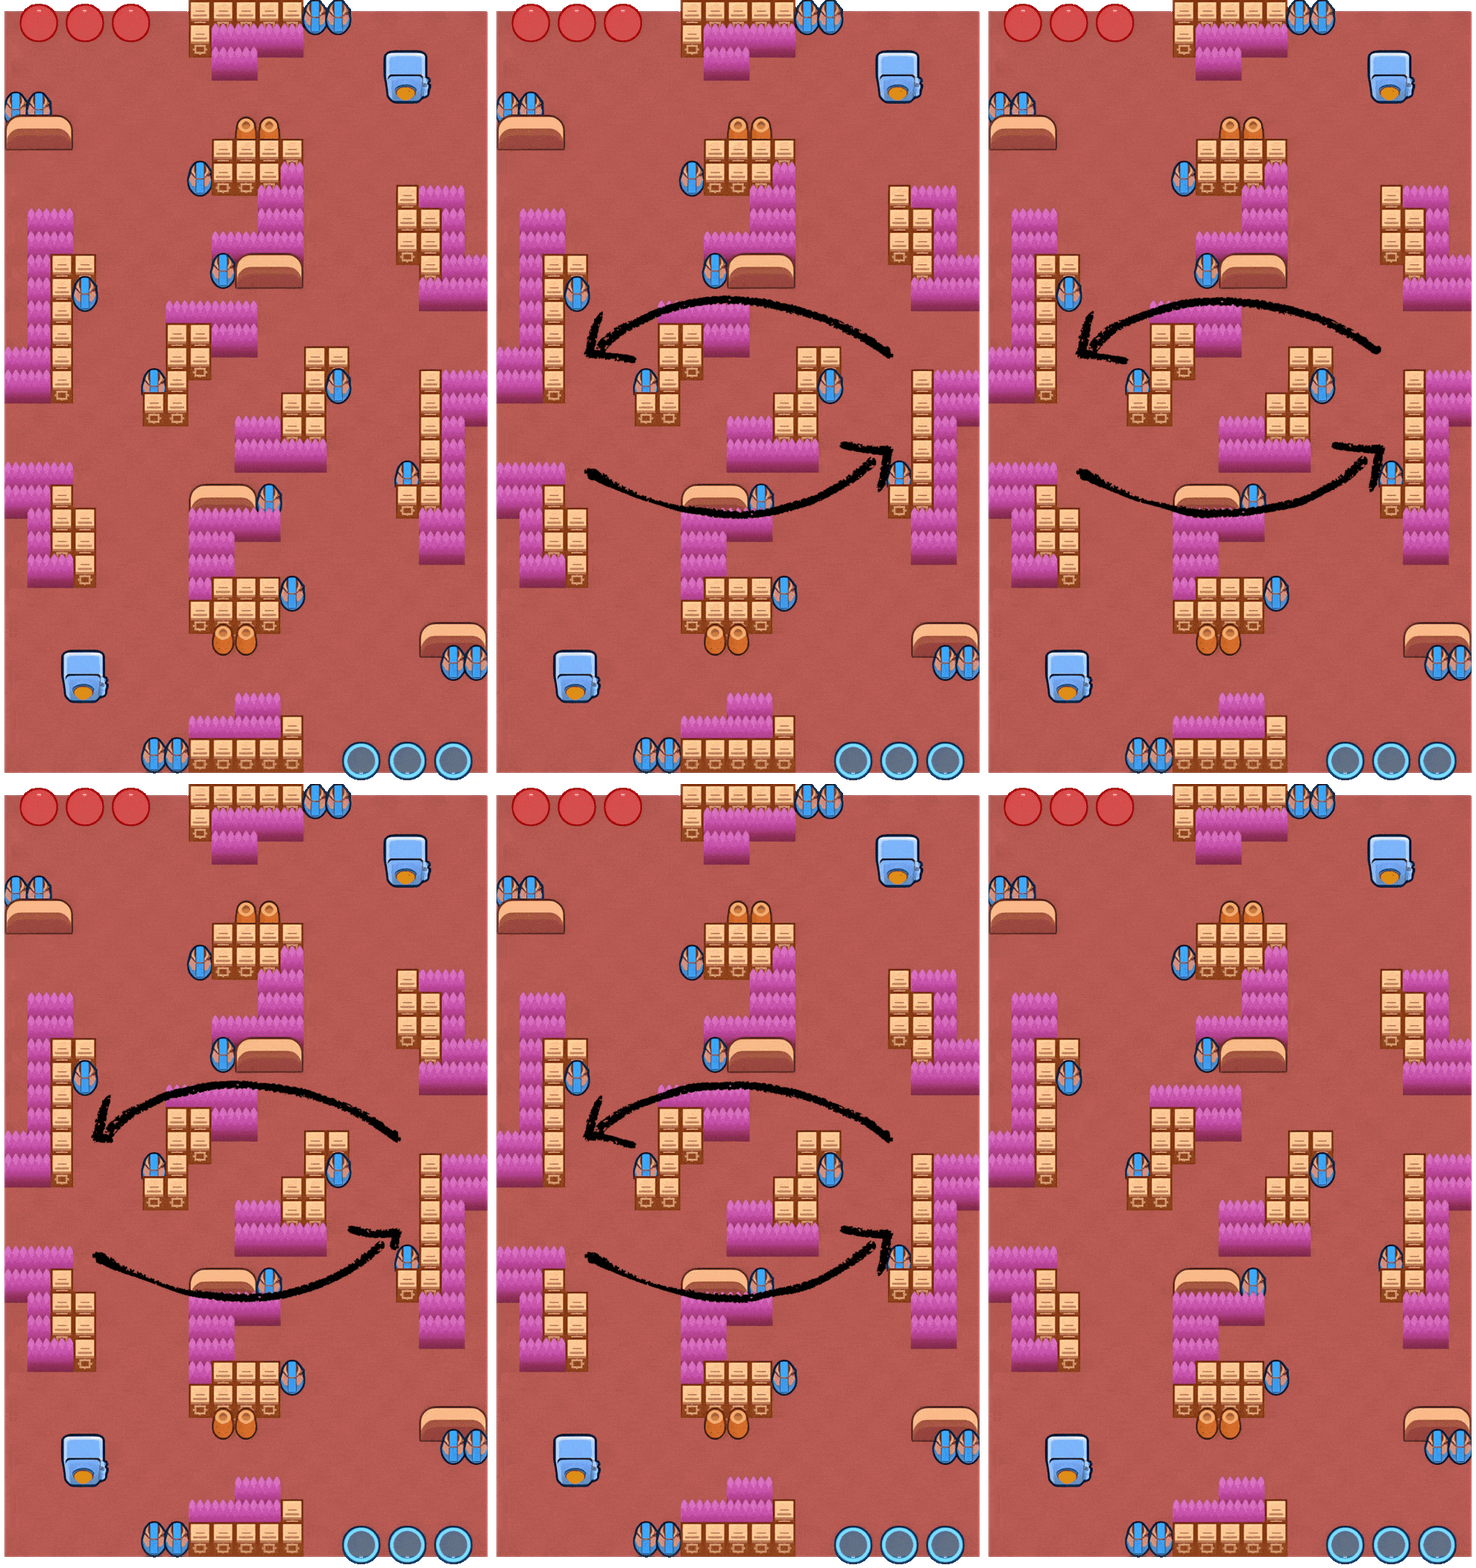 The left and right lanes are open, allowing faster and more direct access to the enemy side, great for speed-based flankers. |
| Center Lane |
|---|
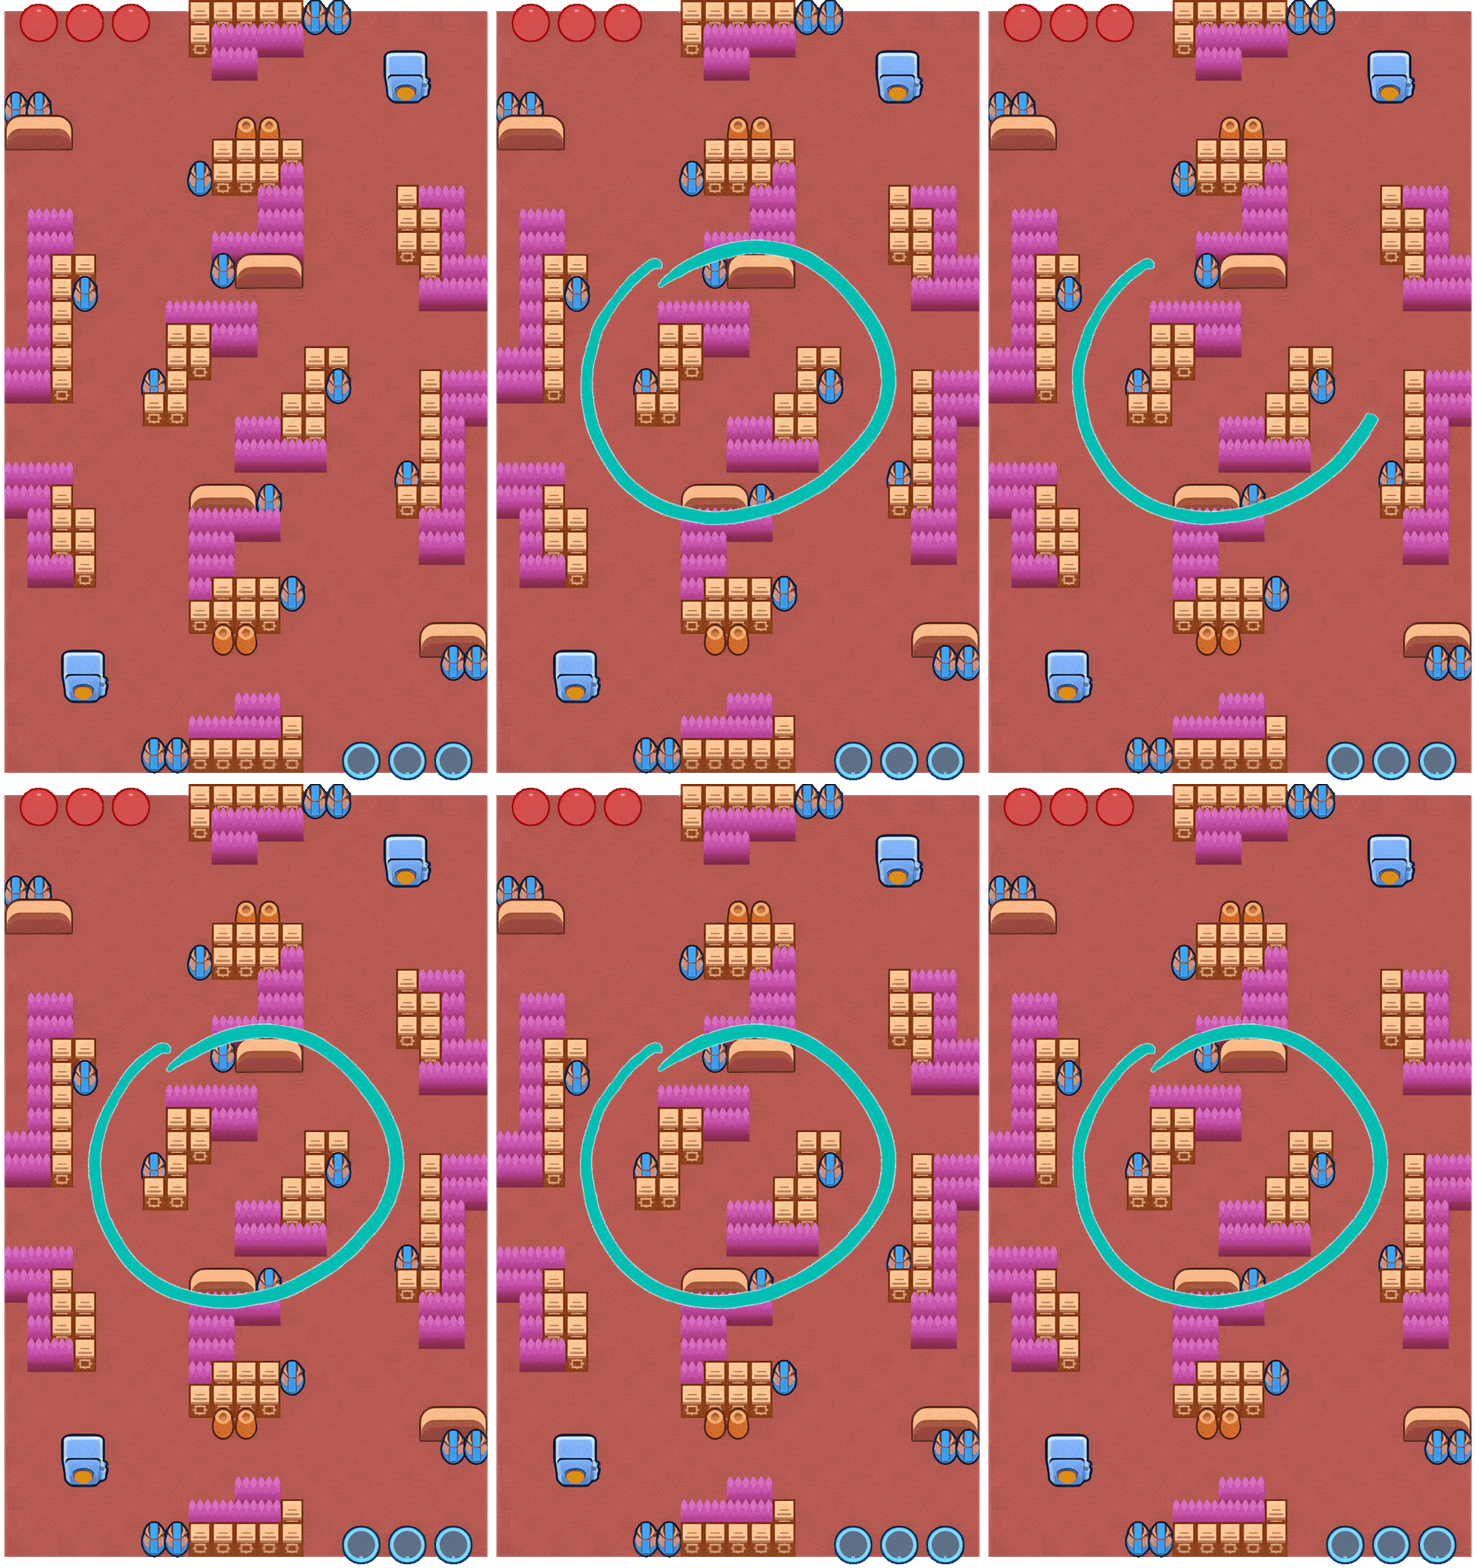 The central path is packed with wall and bush clusters, forming tight corridors—ideal for camping or control-based Brawlers. |
Brawl Stars Traffic Jam Guide: Best Brawlers
| Brawler | Role | Why They’re Effective |
|---|---|---|
 Bull | Close-Range Burst | Dominates open side lanes and can rush straight to the safe with devastating damage. |
 Colt | Wall Breaker or DPS | Can open the tight center lanes and deal heavy long-range damage to enemies and safes. |
 Darryl | Flank & Safe Pressure | Excels at rolling through side lanes and reaching the safe quickly for quick bursts. |
 8-Bit | High DPS Anchor | His damage boost and turret help dominate mid-lane and apply constant pressure. |
 Barley | Area Denial Thrower | Controls the center corridor and burns down enemies trying to push through the choke. |
 Rico | Wall Bounce Flanker | Uses the narrow corridors and bounce walls to apply paint or burst damage unpredictably. |
Brawl Stars Traffic Jam Guide: Tips
Brawl Stars Traffic Jam demands smart lane assignments, quick rotations, and calculated safe pressure. With open side lanes and a clustered center, knowing where to send each Brawler can make the difference between breaking through or falling behind.
Use Bounce Walls to Your Advantage
Walls near the paint ball allow bouncing shots, helping Brawlers like Rico or Amber spread paint and reach hard-to-hit enemies.
Control the Central Bushes
The middle of the map is packed with bushes. Ambush-oriented Brawlers like Sandy or Fang can dominate here and protect the paint ball.
Play for Area Denial
Use wide-painting attacks or supers to claim space. Emz and Max can hold choke points and force enemies away from key areas.
Paint First, Fight Later
In Paint Brawl, territory is everything. Prioritize painting safe zones before rushing into combat—this builds early momentum.
Don’t Overcommit Mid
The center is important, but it’s also risky. Use side angles and flanks to pressure enemies instead of always forcing through the bushes.
Brawl Stars Traffic Jam Guide: Conclusion
Brawl Stars Traffic Jam is a high-pressure Heist map that tests players’ decision-making, lane control, and push timing. With open sides for fast rushes and a tight, defensive center path, it forces teams to coordinate offensive flanks while managing mid-lane threats. Choosing the right Brawlers for each lane—and knowing when to commit or rotate—is crucial to breaking through and securing the win. Focus on damage output, exploit gaps in enemy defense, and always keep pressure on the safe.
Frequently Asked Questions (FAQs)
❓ Which Brawlers are best for this map?
Bull, Colt, Darryl, Barley, and Rico are top picks. Each excels in specific lanes and roles depending on their strengths.
❓ Is the center lane worth using?
Yes, but only for Brawlers with good control or throwers like Barley. The narrow paths make it risky but effective with the right picks.
❓ Are the side lanes easier to push through?
The side lanes, especially the right, are more open and direct. They’re great for rushing the safe or flanking enemies.
❓ Should we focus on defense or offense?
Offense. Heist favors teams that apply constant pressure. Staying back too long can give the enemy a damage advantage.
❓ Can Rico really defend that well?
Yes! Rico’s bouncing shots are perfect for controlling angles near the safe while avoiding direct damage himself.

