 Search
 Account
 Discord


- Slugfest 01
- Slugfest 02
- Slugfest 03
- Stone Block
- Wooden Box
- Wooden Barrel
- Mushroom
- Bush
- Lake
- Launch Pad
- Indestructible Wall
Brawl Stars Brace for Impact Guide: Introduction
The Brawl Stars Brace for Impact map combines open spaces and tight chokepoints, demanding both strategic thinking and quick reflexes. The central area offers room for combat and movement but leaves players vulnerable to enemy fire. Meanwhile, the map’s edges feature narrow corridors and obstacles that provide cover and protection. Players must constantly evaluate their positioning, balancing aggression with caution to avoid getting trapped. The mix of open and confined spaces requires adaptability, as different phases of the game call for varied combat strategies.
Controlling the center of the map is a key aspect of success on Brawl Stars Brace for Impact. This central region offers visibility and quick access to other areas, making it a critical battleground. Players who control the center can dictate the game’s pace, shifting between offensive and defensive strategies. Brawlers with area control or crowd control abilities excel in this space, as they can push enemies away, creating room for their team. Securing the center is vital for gaining the upper hand in the match.
Chokepoints and narrow corridors also play a crucial role in the overall strategy on Brawl Stars Brace for Impact. These bottlenecks can be advantageous or dangerous depending on how they are used. Teams must navigate these spaces carefully, positioning themselves to avoid getting surrounded. Chokepoints can funnel enemies into specific areas where brawlers with knockback or stun abilities can take control. However, rushing into these areas without coordination can lead to being overwhelmed by opponents, so it’s important to approach with caution and work as a team.
The use of cover is crucial for dominating the Brawl Stars Brace for Impact map. While the central areas may seem open for combat, the map’s edges provide valuable spots to hide, set ambushes, or avoid damage. Players should use walls and obstacles strategically to stay protected while applying pressure on enemies. Brawlers with high mobility can quickly maneuver in and out of combat, while ranged brawlers can use cover to deal damage from a safe distance. Timing when to move or hold position is key, as it can determine whether you secure a victory or get eliminated. Adapting to the map’s layout and using its features effectively is what separates skilled players from others.
Brawl Stars Brace for Impact Guide: Map Layout and Features

The Brawl Stars Brace for Impact map presents a unique blend of open spaces and tight chokepoints that forces players to adapt quickly to the flow of the game. The central area of the map offers more room for maneuvering, providing ample space for brawlers to engage in combat or reposition as needed. However, this open area also exposes players to more danger, as they are more visible to enemies and vulnerable to attacks from multiple angles. As a result, players need to balance aggression with caution, carefully choosing when to push and when to retreat. While the central zone provides flexibility in movement, the outer edges of the map offer more cover and defensive advantages.
The outer lanes of the Brawl Stars Brace for Impact map are lined with walls and obstacles, offering players opportunities to hide and regroup. These lanes are vital for defensive strategies, allowing brawlers to avoid direct confrontation while setting up counterattacks. Players with a defensive playstyle can use these obstacles to stay protected while still pressuring the enemy. However, the layout of these obstacles can create bottlenecks, which can trap players if not handled carefully. Effective use of these narrow corridors is key to controlling the match and preventing the enemy from gaining the upper hand.
One of the Brawl Stars Brace for Impact map’s most important features is the strategic value of chokepoints formed by walls and obstacles. These chokepoints can be used defensively or offensively, depending on the situation. Players can funnel enemies into these areas and overwhelm them with focused attacks, but rushing into them without caution can lead to disaster. Brawlers with crowd control or area denial abilities, like stun or knockback, can take advantage of chokepoints to disrupt enemy formations. Mastering the use of chokepoints is crucial to turning the battle in your favor.
With open spaces, narrow corridors, and chokepoints, the Brawl Stars Brace for Impact map requires a balance of offense, defense, and positioning. Players must stay alert, making quick decisions based on the battlefield’s state. Controlling the center and managing chokepoints will give players a significant advantage. Teamwork is also vital, as players need to coordinate, communicate, and support one another to leverage the map’s features. Whether pushing through the center, controlling the edges, or setting traps in narrow lanes, mastering the map’s elements will help secure victory.
Brawl Stars Brace for Impact Guide: Optimal Brawlers
The Brawl Stars Brace for Impact map has a layout that allows various brawlers to excel, particularly those who can navigate both tight spaces and open areas. Tanky brawlers like El Primo, Rosa, and Bull are great choices because of their damage absorption and ability to disrupt enemy formations. These brawlers thrive in narrow corridors and areas with obstacles, using cover to close the gap and engage enemies at close range. Their high health lets them control key areas, especially in the center of the map, where they can push back opponents and control the pace of the game.
High Mobility and Crowd Control Brawlers
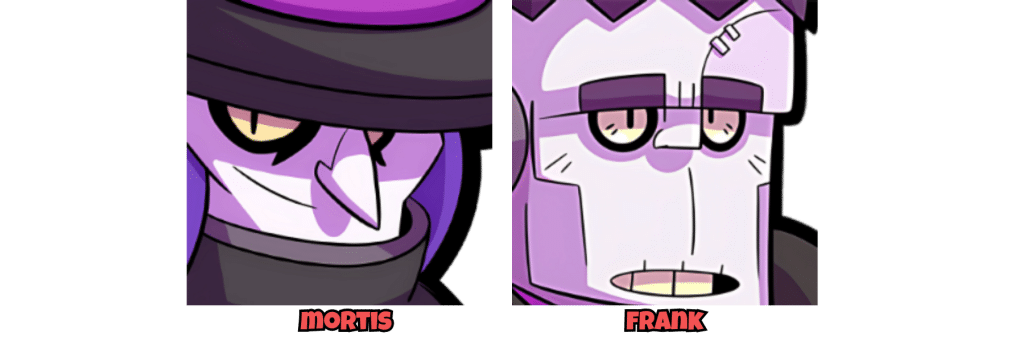
In addition to tanky brawlers, characters with high mobility and crowd control abilities excel on the Brawl Stars Brace for Impact map. Mortis is an ideal pick due to his ability to dash through narrow spaces, avoiding enemy fire while applying constant pressure. His mobility allows him to quickly maneuver in and out of combat, creating opportunities for surprise attacks and flanking the enemy. Similarly, Frank is a strong option, especially with his ability to stun enemies with his Super. Frank can control chokepoints, making it harder for enemies to advance through key areas. His crowd control capabilities are crucial for disrupting enemy pushes and setting up successful team strategies.
Ranged Brawlers on the Map

Ranged brawlers like Piper and Brock can still be effective on this map, despite the emphasis on close-quarters combat. While they are not ideal for tight spaces, they can still perform well if used strategically. These brawlers should focus on positioning themselves behind cover, using their long-range attacks to pick off enemies hiding behind obstacles. Brock’s explosive damage and Piper’s precise shots can force enemies to rethink their approach, especially if they are trying to push through open areas or chokepoints. These ranged brawlers should remain mindful of their surroundings and avoid getting too close to the action, as they are vulnerable to faster or tankier opponents if caught off guard.
Adapting to the Layout for Success
Overall, the key to success on the Brawl Stars Brace for Impact map is selecting brawlers who can adapt to the dynamic layout. Tanky brawlers control the center and push through narrow spaces, crowd control characters manage chokepoints, and ranged brawlers provide support from a distance. By using the map’s features effectively and leveraging the strengths of your brawlers, you can outmaneuver opponents and create opportunities for victory.
Brawl Stars Brace for Impact Guide: Bounty on Brace for Impact

The Brawl Stars Brace for Impact map in Bounty mode requires a balance of offense, defense, and positioning due to its mix of open spaces and tight chokepoints. Controlling the central area is crucial, as it provides visibility across key points and allows teams to dictate the pace of the game. Teams that manage to hold the center can often force the enemy to push through more vulnerable edges or waste time trying to contest the middle, opening opportunities for coordinated attacks. Having the right brawlers in the center can limit the enemy’s movement and force them to play more defensively, giving your team the advantage.
The narrow corridors and chokepoints on the edges of the Brawl Stars Brace for Impact map offer strategic opportunities, especially for brawlers with crowd control, knockback, or area damage abilities. If your team can control these areas, you can funnel enemies into specific spots where they can be eliminated easily, securing valuable stars. However, these chokepoints also present risks. Moving into these narrow lanes without backup can leave you exposed and vulnerable to enemy attacks. It’s important to approach these spaces with caution, ensuring that your team works together to control the flow of the game.
The scattered obstacles on the Brawl Stars Brace for Impact map provide cover and offer opportunities for both offense and defense. Ranged brawlers, such as Piper or Brock, can use these obstacles to attack from a distance, while tankier brawlers can use them to advance or retreat without taking too much damage. The key to success lies in knowing when to move and when to take cover. Timing your actions and using cover effectively can help avoid unnecessary deaths and make it easier to secure kills without exposing yourself to counterattacks. Adapting to the flow of the match and using the environment to your advantage can turn the tide in your favor.
Team coordination is essential in Bounty mode, especially on a map like Brawl Stars Brace for Impact, where the environment plays a big role in shaping the gameplay. Working together to eliminate key targets while protecting your teammates will increase your chances of success. It’s important to adjust your strategy based on the game’s progress—if you’re ahead in stars, play more defensively, focusing on holding your position. If you’re behind, be more aggressive and take risks to eliminate enemies and collect stars. Effective coordination and adaptability are key to securing victory in this fast-paced and strategic map.
Brawl Stars Brace for Impact Guide: Key Strategies
The Brawl Stars Brace for Impact map offers a dynamic battleground that combines open spaces and narrow chokepoints, requiring a mix of offense and defense. Players need to be adaptable and adjust their strategies based on the flow of the game. Success on this map depends on team coordination, map awareness, and effective use of cover. Whether controlling the center, managing chokepoints, or using obstacles to your advantage, every move counts. In this guide, we’ll cover the key strategies for mastering Brace for Impact and gaining the upper hand in battle.
Controlling the Central Area
Controlling the central area is key on the Brawl Stars Brace for Impact map. It offers access to all parts of the map, allowing for quick rotations and pressure from multiple angles. By controlling the center, your team can limit enemy movement and force them to play defensively. High-mobility brawlers like Mortis or tanky brawlers like El Primo are ideal here, as they can use cover and engage in close-range combat. Holding the center also helps your team respond quickly to threats and support teammates when necessary.
Managing Chokepoints and Outer Lanes
Managing chokepoints and outer lanes is crucial for both offense and defense. Chokepoints can funnel enemies into kill zones, creating opportunities for crowd control brawlers like Frank or Barley. Positioning is key here—block enemy movement while maintaining pressure. However, chokepoints can be dangerous if approached recklessly. Without proper backup, you risk being trapped by the enemy, so always coordinate with your team to control these critical areas.
Utilizing Obstacles for Cover and Sightlines
Obstacles are essential for controlling the flow of battle. They provide cover for hiding, setting ambushes, and maintaining sightlines to key areas. Ranged brawlers like Piper or Brock can use obstacles to stay protected while dealing damage. Tanky brawlers can use them to heal or reposition. Additionally, brawlers like Gene or Poco can create disruption or healing zones behind obstacles, giving your team an edge. Using obstacles effectively can help your team gain the upper hand in key moments.
Team Coordination and Adaptability
Team coordination and adaptability are crucial for success. While individual skill matters, being able to work together and adjust to the dynamic flow of battle is what makes the difference. If ahead, focus on holding key areas and playing defensively; if behind, take calculated risks to create elimination opportunities. Effective teamwork, rotations, and using the map’s features to your advantage will help your team secure the win.
Brawl Stars Brace for Impact Guide: Conclusion
The Brawl Stars Brace for Impact” map provides an exhilarating challenge that requires players to balance aggressive pushes with defensive plays. With its diverse layout of open spaces and narrow chokepoints, the map offers opportunities for various strategic approaches, but success depends on your ability to make quick decisions and adjust your strategy on the fly. The center of the map often becomes the focal point of intense combat, while the outer lanes and chokepoints can be used strategically to control enemy movements and surprise them with well-timed attacks. Understanding these key features and adjusting your approach accordingly is crucial to gaining an advantage over the opposition.
One of the most significant aspects of the Brawl Stars Brace for Impact map is the importance of positioning. Players who master the art of positioning themselves in relation to the map’s obstacles, chokepoints, and open spaces will have a clear upper hand. For example, knowing when to push through the central area or when to retreat to the edges for cover can make all the difference in the heat of battle. While aggression can be rewarding, particularly with the right brawlers, overextending without proper positioning can leave your team vulnerable. A strategic understanding of the map’s layout and adapting to the ever-changing dynamics of the match can turn a seemingly disadvantageous situation into an opportunity for a counterattack.
Effective teamwork is also crucial in ensuring success on this Brawl Stars Brace for Impact map. Since the layout encourages dynamic battles with both close and ranged combat, being able to coordinate movements, rotations, and tactics with your teammates can give your team the upper hand. Whether you are controlling chokepoints or holding the central area, communication with your team will help in executing strategies and ensuring that no one is caught off guard. Working together to outsmart and outmaneuver the opposition, whether through crowd control, healing, or flanking tactics, is essential for securing key eliminations and gaining control of the map.
Ultimately, the key to victory on the Brawl Stars Brace for Impact map is the ability to combine tactical thinking with flexibility. Success on this map is not only about holding key areas and securing eliminations but also about making timely decisions that allow your team to adapt to the map’s shifting dynamics. Whether it’s taking control of the center, managing chokepoints, or using obstacles to create favorable sightlines, the right strategy and team coordination can help players dominate the map and emerge victorious in this fast-paced environment. When played correctly, this map offers players plenty of opportunities to outsmart and outplay their opponents, ensuring a thrilling experience every time.

