 Search
 Account
 Discord


- Gift Shop 01
- Navy Block – 28
- Cardboard Box – 12
- Wooden Barrel – 8
- Hardwood Fence – 44
- Television Stand – 16
- Bush – 98
Brawl Stars Medal Madness Guide: Introduction
The Brawl Stars Medal Madness map is a fast-paced battlefield that requires quick thinking and strong team coordination. The map features a central area where the majority of action takes place, with obstacles scattered around providing opportunities for strategic positioning. Controlling the central zone is key, as it holds the medals that determine the outcome of the game. Teams must fight for dominance in this area while preventing the enemy from collecting medals. The central zone often becomes chaotic, making it essential to find the right balance of aggression and defense to secure victory.
Mastering the central area is vital for success on this Brawl Stars Medal Madness map, but it’s important not to rush in blindly. Moving in too quickly can expose you to ambushes or attacks from enemies controlling the edges. Instead, players need to strategically time their movements, choosing when to advance and when to fall back. Controlling the center is not just about collecting medals, but also about denying the enemy the chance to do the same. Having the right mix of offensive and defensive brawlers in this area can make all the difference in holding it long enough to secure the win.
The edges of the Brawl Stars Medal Madness map also play a crucial role. They provide space for flanking, healing, and repositioning, giving players opportunities to attack from unexpected angles or escape danger. Brawlers like Leon or Crow can use the outer areas and bushes to surprise enemies or steal medals while avoiding direct confrontations. Each side of the map offers different strategic advantages, so understanding how to use the edges effectively is just as important as controlling the center.
Winning in Brawl Stars Medal Madness requires strong teamwork and coordination. Different brawlers play specific roles based on their abilities—tank brawlers like El Primo can absorb damage and hold the center, while ranged brawlers like Penny or Barley offer support from the backlines. Players need to communicate to maintain control of the central area and collect medals while also defending against enemy pushes. With practice and effective teamwork, you can master the map’s layout, work together to outmaneuver the enemy, and secure victory in Medal Madness.
Brawl Stars Medal Madness Guide: Map Layout and Key Features
The Brawl Stars Medal Madness Map features a dynamic, open layout that encourages both aggressive and tactical strategies. At the center of the map lies the focal point, where most of the medals are located and where teams fight for control. However, reaching and holding this area is challenging, as it’s surrounded by walls and obstacles that provide cover but also limit movement. The map’s asymmetry means that each side offers a slightly different approach to the center, giving players the opportunity to adjust their tactics based on their positioning, whether opting for an aggressive push or a more cautious strategy.
The central area is enclosed by these walls, but it’s far from a simple space to control. The design requires players to plan their moves carefully, as there are multiple angles from which enemies can approach. Brawlers will need to use these walls for cover during combat while also watching for opportunities to break through or flank the enemy. On either side of the central zone, the layout presents different paths and obstacles that can be used for offense or defense, making the middle zone highly dynamic and ever-changing. The combination of walls, obstacles, and open space in the middle keeps both teams on their toes, forcing players to constantly shift their positioning and respond to new threats.
Throughout the Brawl Stars Medal Madness map, scattered bushes add a layer of strategic depth. These bushes serve as hiding spots for stealthy brawlers like Leon or Crow, allowing them to surprise enemies with sudden attacks or sneak past defenses. They offer great opportunities for ambushes, catching opponents off guard and disrupting their plans. However, bushes are a double-edged sword—while they provide cover, they can also be dangerous if the enemy anticipates their use. Opponents can counter with traps or their own stealthy brawlers. As a result, players must be cautious when moving through or into these areas, weighing the risks and rewards of using bushes for cover.
The Brawl Stars Medal Madness map’s layout encourages constant movement and adaptability, requiring players to make the most of the map’s key features—walls, obstacles, and bushes—while also managing the more open central area. Balancing offensive pushes, defensive maneuvers, and ambush tactics in the right moments can help teams control the map and collect the crucial medals needed for victory.
Brawl Stars Medal Madness Guide: Medal Collection

The core objective of the Brawl Stars Medal Madness Map revolves around the collection and control of medals scattered throughout the central zone. This mechanic is what drives the gameplay, as teams must battle to gather as many medals as possible and hold onto them until the time runs out or the objective is achieved. The team with the most medals at the end of the match wins, making the central area incredibly important. Controlling the middle zone is essential for medal collection, but it’s also a risky endeavor, as it often becomes the focal point of enemy attacks. The tension lies in balancing the need to secure medals while avoiding getting overwhelmed by opposing teams.
The central area is where much of the action occurs, with both teams vying for control. Aggressive plays can be an effective strategy, but the risk is that leaving the center unprotected can result in the enemy swooping in to steal your hard-earned medals. Holding the center means you have to constantly watch for enemies trying to disrupt your collection, whether they’re hiding in bushes or flanking from the sides. Therefore, it’s crucial to stay vigilant and position your team well to avoid being caught off guard. The dynamics of this central zone require not only offensive tactics but also strong defensive strategies to maintain control and keep the medals safe.
To effectively dominate the central zone, team coordination is key. Tanky brawlers with high health and damage absorption capabilities, like El Primo or Frank, are essential for holding the area and absorbing incoming damage. These brawlers can serve as a frontline barrier, protecting the rest of the team as they gather medals. At the same time, ranged brawlers such as Penny or Barley, or support brawlers like Pam or Byron, can contribute by dealing damage from a distance, healing teammates, or providing crowd control. The synergy between defensive and offensive brawlers is critical to maintaining control over the center while still gathering medals.
However, simply holding the center isn’t enough. Securing the medals you collect is just as important, as enemy teams will often make a push to reclaim the medals once they’re in your possession. Players need to be mindful of their positioning and work together to secure the medals before the enemy team can take them. Positioning is crucial, as leaving your medals vulnerable or making a hasty retreat can lead to losing hard-earned progress. Effective coordination to both defend and attack in the central area is the key to success in the Brawl Stars Medal Madness Map, making teamwork and strategy a priority in achieving victory.
Brawl Stars Medal Madness Guide: Best Brawlers
In Brawl Stars Medal Madness, the map’s layout and objectives require different brawlers to excel based on your team’s strategy. The key to success lies in controlling the central zone, collecting medals, and fending off enemy pushes. Certain brawlers stand out for their mobility, durability, and damage output, making them ideal for this map. Whether you’re holding the center, supporting from the backlines, or flanking, selecting the right brawler can make a significant impact. Here’s a breakdown of the best brawlers for Medal Madness and how they can give your team an edge.
Tanky Brawlers

Tanky brawlers, such as El Primo, Bull or Frank, are excellent choices for taking and holding the center. These brawlers have high health pools and strong offensive capabilities, allowing them to absorb significant damage while contesting the valuable medals in the middle. Their ability to withstand enemy attacks makes them ideal for engaging in the intense battles that take place around the central area, where controlling space is key to maintaining an advantage. With their durability, they can also act as a frontline to protect more vulnerable teammates.
Ranged Brawlers

Ranged brawlers like Barley and Penny excel in applying pressure from a distance. These brawlers are perfect for staying on the outskirts of the central area, dealing consistent damage while remaining relatively safe from enemy attacks. Penny’s ability to drop her cannon and Barley’s explosive attacks are particularly effective when positioned properly, allowing them to deal damage to enemies attempting to capture medals or push into the center. By staying at range, these brawlers can support their team without getting caught up in the chaos, helping to weaken opponents before they even reach the central zone.
Support Brawlers

Support brawlers like Byron and Pam also play an important role in Brawl Stars Medal Madness. Pam, with her healing turret, can provide sustain to her team, keeping them in the central area for longer periods of time. She helps absorb pressure from the enemy while enabling her team to stay in the fight. Byron, with his healing and damaging abilities, can heal teammates or deal damage to opponents from a distance, offering versatility in both offense and defense. These support brawlers can shift the tide of battle by maintaining the team’s health and giving them the staying power needed to hold the center and collect medals efficiently.
Mobile Brawlers
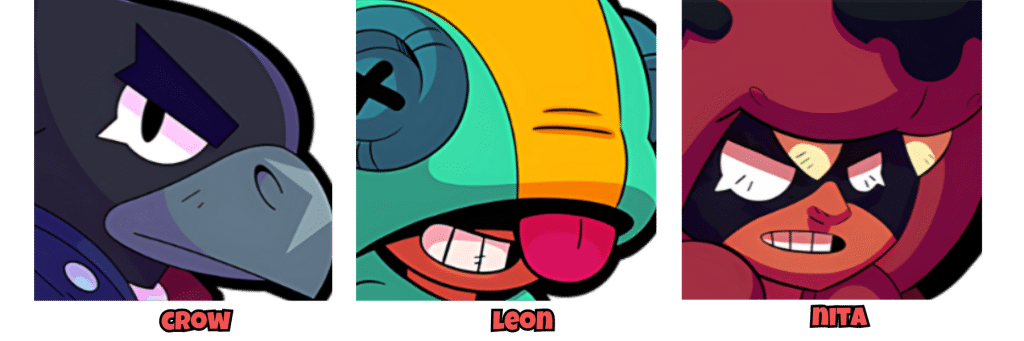
When it comes to mobility, brawlers like Crow, Leon, and Nita excel. These agile brawlers can quickly move across the map, flanking enemies and snatching medals. Crow is especially effective with his poison attacks, weakening opponents and making it easier for his team to control the central area or stop enemy advances. Leon, with his invisibility, can slip past defenses, steal medals, and sow confusion among enemies. Nita, leveraging both her bear and mobility, can dart in and out of the central area, stealing medals or disrupting enemy pushes. These brawlers are great for exploiting the map’s bushes, using stealth and speed to catch enemies off guard and gain an advantage in the chaotic central zone.
Each of these brawlers plays a vital role in controlling the flow of the match. Whether you prefer tanky brawlers to hold the frontlines, ranged attackers to support from afar, or fast and sneaky brawlers to outmaneuver your opponents, selecting the right brawler for your strategy will be key to victory in the Brawl Stars Medal Madness Map.
Brawl Stars Medal Madness Guide: Tips and Tricks

To excel in Brawl Stars Medal Madness, utilizing strategies that leverage your team’s strengths and the map’s features can make all the difference. Below are a few tips and tricks that will help you maintain control of the central area and manage the trophy collection effectively. Mastering these strategies can improve your chances of winning and help your team secure victory.
Trophy Carrier
⭐ A key strategy in Brawl Stars Medal Madness is selecting the right brawler to carry the Trophy. Ideally, this role should be given to the brawler with the highest HP. Tanky brawlers like El Primo, Frank, or Bull can absorb more damage, allowing them to hold the Trophy longer and withstand attacks that would easily take out lower-HP brawlers. However, simply having a high HP brawler isn’t enough. You must protect the Trophy carrier by using other brawlers to block or distract enemy attacks. The goal is to keep the Trophy holder alive while filling up the gauge to secure a win. Effective protection allows the carrier to focus on surviving long enough to complete the task.
Covers
⭐ Taking advantage of cover on the map is crucial in Brawl Stars Medal Madness. Once you’ve grabbed the Trophy, immediately seek cover to reduce your exposure to enemy fire. Covers, such as walls and obstacles in the central area, can shield you from attacks and buy you precious time to fill up the gauge. When moving through the map, try to plan your routes around these covers so that you can minimize the risk of being caught in an open area. Strategic use of cover helps not only with defense but also with positioning, allowing you to control the flow of the match and keep the Trophy out of enemy hands for longer periods.
Kill Enemies
⭐ Another important tactic in Brawl Stars Medal Madness is eliminating enemies before they can steal the Trophy. When you kill an enemy brawler, it secures the Trophy for a brief moment and gives you a bit of time to fill the gauge. The temporary lull in enemy pressure also provides an opportunity to reposition and get to a more advantageous spot. Whether you’re using a tanky brawler to engage in direct combat or a ranged brawler to deal damage from a distance, taking out enemies is a crucial step in buying your team time to advance or defend the central area. By consistently eliminating opponents, you reduce the chances of your Trophy carrier being overwhelmed or ambushed.
In Brawl Stars Medal Madness, securing the Trophy and protecting it while filling up the gauge is key to winning. Whether you’re choosing the right Trophy carrier, making use of cover, or taking down enemies to secure a moment of respite, each action should be aimed at prolonging your control of the center. By implementing these tips and tricks, you can provide your team with a strategic advantage, keeping the pressure on your opponents and helping your team succeed in the fast-paced chaos of Brawl Stars Medal Madness.
Brawl Stars Medal Madness Guide: Conclusion
Mastering Brawl Stars Medal Madness requires a blend of strategy, teamwork, and the ability to adapt to rapidly changing situations. The map’s layout demands a well-thought-out approach, where controlling the central area is crucial, but success isn’t just about brute force. It’s about understanding how to utilize the map’s unique features like cover, bushes, and strategic positions around the edges. Players must balance aggressive tactics with careful positioning, ensuring they can both collect medals and fend off opponents. Knowing when to engage and when to retreat can turn the tide in tight matches, especially when the central area becomes a battlefield of intense skirmishes.
To truly excel in Brawl Stars Medal Madness, coordination is key. Teams must work together to ensure the Trophy holder is protected while the rest of the squad focuses on dealing with threats and supporting the carrier. With consistent communication and a clear game plan, your team can control the flow of the match, outmaneuver opponents, and maintain the pressure needed to win. As you gain more experience with the map, you’ll learn to predict enemy movements, capitalize on mistakes, and refine your strategies. This will not only make you a stronger competitor but will also contribute to your team’s overall success in this high-energy, medal-collecting battleground.

