 Search
 Account
 Discord


- Slugfest 01
- Slugfest 02
- Slugfest 03
- Sandstone Block – 22
- Wooden Box – 20
- Wooden Barrel – 4
- Wooden Fence – 8
- Cactus – 4
- Skull – 2
- Bush – 111
- Lake – 4
- Indestructible Wall – 12
Brawl Stars Kaboom Canyon Guide: Introduction
Brawl Stars Kaboom Canyon is a map that combines open spaces with narrow passages, making it a playground for strategic play. The map features a large, open central area surrounded by bushes and walls that provide cover, allowing players to position themselves for sneak attacks, ambushes, or quick retreats. The outer edges of the map are lined with open lanes that allow for more maneuverability, but they also expose players to enemy fire. This mix of open and enclosed spaces requires players to balance aggression with caution, making positioning, timing, and map control essential for success.
The central area of Brawl Stars Kaboom Canyon is key, especially in Gem Grab and Heist, offering cover and strategic positioning. It becomes a hotspot for intense battles as both teams fight for control. The surrounding lanes allow for flanking and pressuring opponents, but focusing too much on them can leave players vulnerable to being trapped or flanked. This constant battle for control between the center and outer lanes makes the map dynamic, requiring teams to stay alert and adapt quickly.
Each game mode in Brawl Stars Kaboom Canyon presents unique challenges. In Gem Grab, controlling the central area is crucial, but be mindful of potential enemy flanks from the outer lanes. In Heist, long lanes provide opportunities for sneak attacks, while the central area is key for defense. For Bounty, the mix of open spaces and tight corners makes it ideal for ranged brawlers who can stay protected while dealing damage. In Showdown, the layout forces players to navigate obstacles and plan carefully, especially as the play zone shrinks and central areas become hotspots for surprise attacks.
Mastering Brawl Stars Kaboom Canyon requires understanding the terrain and adapting to its features. Mid-range brawlers like Carl or Bo excel at maneuvering through both narrow passages and open lanes. Tanks like Bull or El Primo thrive in the central area, engaging enemies in close combat and controlling choke points. Ranged brawlers such as Piper or Brock can deal damage from a distance, especially in the open lanes. The map’s varied terrain requires players to adjust their strategy depending on the mode, brawlers, and the flow of the match. With practice and strategic positioning, Kaboom Canyon rewards clever tactics and strong teamwork.
Brawl Stars Kaboom Canyon Guide: Map Layout
Brawl Stars Kaboom Canyon is a map that demands strategic thinking and precise positioning. The central area of the map is typically open, creating a large space where team fights often occur. While there are a few scattered walls that provide some cover, the central zone remains a hotspot for intense engagements. This area is ideal for brawlers who excel in close combat or can push through tight spaces, as they can take advantage of the occasional cover to engage enemies head-on. However, the lack of significant obstacles in the middle also means that players must be cautious about positioning and timing, as they are more vulnerable to attacks from multiple directions.
The outer edges of Brawl Stars Kaboom Canyon present a stark contrast to the central area. These long lanes provide more room for maneuvering and offer a safer space for ranged brawlers to operate. Ranged attackers, such as Piper or Brock, can use these lanes to deal damage from a distance while avoiding the chaos in the central area. However, these lanes also expose players to enemy flanks and attacks, so players must remain aware of their surroundings and avoid becoming too predictable. Moving along the edges can be an effective strategy for taking control of the map, but it requires constant attention to positioning and timing to avoid being caught in a vulnerable spot.
The terrain of Brawl Stars Kaboom Canyon plays a pivotal role in shaping the gameplay. The map features a variety of obstacles, including barrels and walls, placed throughout key areas. These obstacles offer opportunities for players to hide, regroup, or set up strategic plays. They are especially important for setting traps, ambushing enemies, or controlling choke points. By using the terrain to your advantage, you can gain a tactical edge over your opponents, either by avoiding damage or by forcing enemies into difficult positions. Understanding the placement of these obstacles and when to use them for cover or attacks can make a significant difference in the outcome of the match.
Overall, Brawl Stars Kaboom Canyon is a map that rewards adaptability and awareness. The open central area calls for aggressive plays and close combat, while the outer lanes offer space for ranged brawlers to deal damage without getting too close. The variety of terrain features adds an extra layer of complexity, giving players the tools they need to outmaneuver their opponents. Mastering Kaboom Canyon involves learning when to control the central area, when to use the outer lanes for safety, and how to leverage the map’s terrain to gain an advantage in each mode. With the right strategy, you can turn the map’s layout to your favor and secure victory for your team.
Brawl Stars Kaboom Canyon Guide: Brawler Choices
Brawl Stars Kaboom Canyon is a map that offers a variety of strategic opportunities, thanks to its balance of open spaces and narrow lanes. The layout requires players to be adaptable, using the map’s features to gain an edge in different game modes. Choosing the right brawlers for each situation is critical to mastering the map. The key is selecting brawlers who can both take advantage of the map’s open areas and navigate its tight passages, all while being able to capitalize on the strategic importance of the central zone. In this section, we will explore the best brawlers suited for Kaboom Canyon, considering the key areas of the map and their respective strengths.
Tanks for the Central Area

The success of your team on Brawl Stars Kaboom Canyon heavily relies on choosing the right brawlers who can adapt to the map’s unique features. Tanks like Bull and El Primo excel in the central area, where their high health and strong offensive capabilities allow them to engage enemies head-on. These brawlers are particularly useful in controlling choke points and securing objectives, as they can tank damage while pushing forward. Their ability to clear out enemies in close combat makes them powerful forces in the open spaces of Kaboom Canyon, but they need support from teammates to handle ranged threats from the outer lanes.
Ranged Brawlers for the Outer Lanes

Ranged brawlers, such as Tara, Piper, and Brock thrive in Brawl Stars Kaboom Canyon’s longer lanes. These brawlers can safely dish out heavy damage from a distance, staying protected by the map’s obstacles like walls and barrels. They can exploit the open spaces of the lanes to pick off enemies from a safe distance while avoiding close combat situations. The key for these brawlers is positioning, as they need to stay far enough away from the enemy’s line of sight to deal damage but close enough to make an impact on the battle. With their range advantage, they can also hold off enemy tanks or stop pushes before they gain momentum.
Mid-Range Brawlers for Versatility
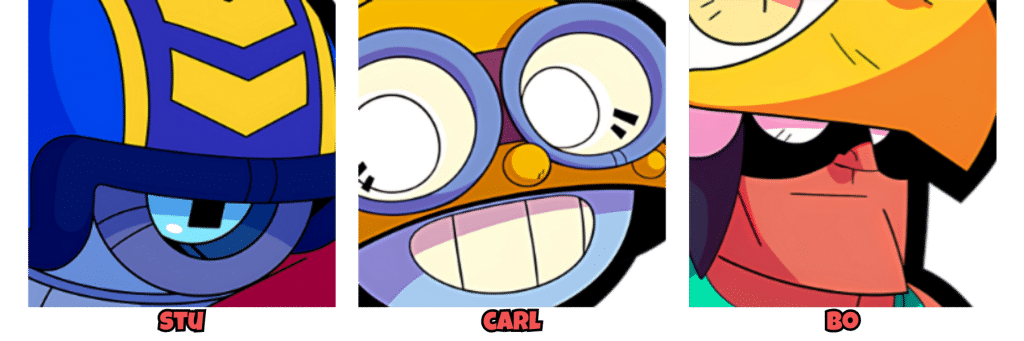
Mid-range brawlers like Stu, Carl, and Bo are perfect for Brawl Stars Kaboom Canyon’s mix of open and tight spaces. These brawlers have the mobility and versatility to maneuver through the narrow passages while still having the damage output to handle threats in both open and confined areas. Their range and mobility allow them to adapt to the shifting battle, whether they need to dive into the central area for close combat or hang back to deal damage from a distance. Mid-range brawlers excel in holding control over key areas of the map, whether it’s blocking off lanes, taking out opponents hiding behind cover, or moving through the central area to pressure enemies.
Support Brawlers for Area Control

Support brawlers like Barley and Penny are particularly effective on Brawl Stars Kaboom Canyon due to their area-of-effect abilities and utility. These brawlers can control large areas, deal consistent damage, and assist in blocking enemy movements, especially in modes like Siege. Their splash damage is perfect for disrupting enemy positioning, forcing opponents out of cover, and dealing with swarming enemies. Support brawlers can also help clear obstacles, support the Siege Bot, and make sure that enemy pushes are halted before they can reach your tower. Choosing these brawlers can turn the tide of a match, particularly in the center or during critical phases of the game.
In general, the key to success on Brawl Stars Kaboom Canyon is to balance offense with defense while taking full advantage of the map’s open and narrow spaces. Brawlers who can either engage in close combat or control large areas of the map will perform best here. Understanding the synergy between brawlers and utilizing their strengths in combination with the terrain will be essential to victory. Whether you need a tank to dominate the central zone, a ranged attacker to hold the outer lanes, or a support brawler to control key areas, selecting the right team is crucial to mastering Kaboom Canyon.
Brawl Stars Kaboom Canyon Guide: Heist on Kaboom Canyon

Heist on Brawl Stars Kaboom Canyon demands a balanced strategy, with a strong emphasis on both offense and defense. The map’s key features—narrow side lanes and a central open area—make the battle dynamic and strategic. The side lanes provide sneaky routes for attackers, but these can also expose them to enemy fire, requiring careful positioning. Meanwhile, the central area offers a focal point for both teams to engage in direct confrontation, making it an important battleground for control.
For attacking teams, planning the approach is essential. The open lanes offer room for maneuvering but leave attackers vulnerable to counterattacks. Ranged brawlers like Piper or Brock are effective at keeping enemies at bay from a distance while attempting to break into the defense. These brawlers can use their range to deal damage from the outer lanes, but they must be mindful of being flanked or overwhelmed. A combination of tanks like El Primo or Bull is also crucial—they can absorb damage and act as distractions while the rest of the team focuses on damaging the safe or pushing through.
Defending teams need to focus on controlling both the outer lanes and the central area. The primary goal is to prevent the attacking team from reaching your safe, making control of the lanes vital. Brawlers like Bull or El Primo excel here because they can block incoming attackers and absorb hits, allowing your team to focus on taking down the opposition. Ranged brawlers such as Piper and Brock are great for providing cover fire from a distance, preventing attackers from sneaking through the lanes. Their long-range capabilities can stop enemies before they get too close to your safe, making it easier to control the flow of the match.
Support brawlers like Barley or Penny are incredibly effective for defending the central area. Their area-of-effect damage can clear out groups of enemies or prevent attackers from advancing. By using these brawlers to control the central chokepoints, you can slow down attackers and create opportunities for your team to respond. Timing, positioning, and map awareness are key in Heist on Brawl Stars Kaboom Canyon. A well-coordinated defense can thwart the most determined attackers, while a smart offensive strategy can lead to a successful push and secure victory.
Brawl Stars Kaboom Canyon Guide: Tips and Tricks
Brawl Stars Kaboom Canyon is a map full of unique opportunities and challenges that demand a strategic approach. Mastering this map requires players to adapt quickly, use the terrain effectively, and work together as a team. Below are some valuable tips and tricks to help you dominate on Kaboom Canyon, whether you’re attacking, defending, or supporting your team’s objectives. By understanding how to make the best use of the map’s features, you can turn the tide in your favor and secure victory.
Walls and Bushes

The central area of Brawl Stars Kaboom Canyon is filled with walls and bushes, offering cover for ambushes and strategic retreats. Use the bushes to hide and surprise enemies trying to control the middle, and make sure to break down key obstacles if your opponents dominate the area. This can disrupt their positioning and shift the momentum of the match, giving your team a chance to regain control.
Thrower Brawlers

Thrower brawlers like Barley, Penny, or Tick are highly effective on Brawl Stars Kaboom Canyon, especially in the central area. They can attack from behind cover, dealing damage while staying safe. Throwers can also support the team by controlling lanes and applying pressure to the enemy’s safe from a distance. Be sure to include at least one thrower in your team composition to maximize your strategic advantage.
Super Attack
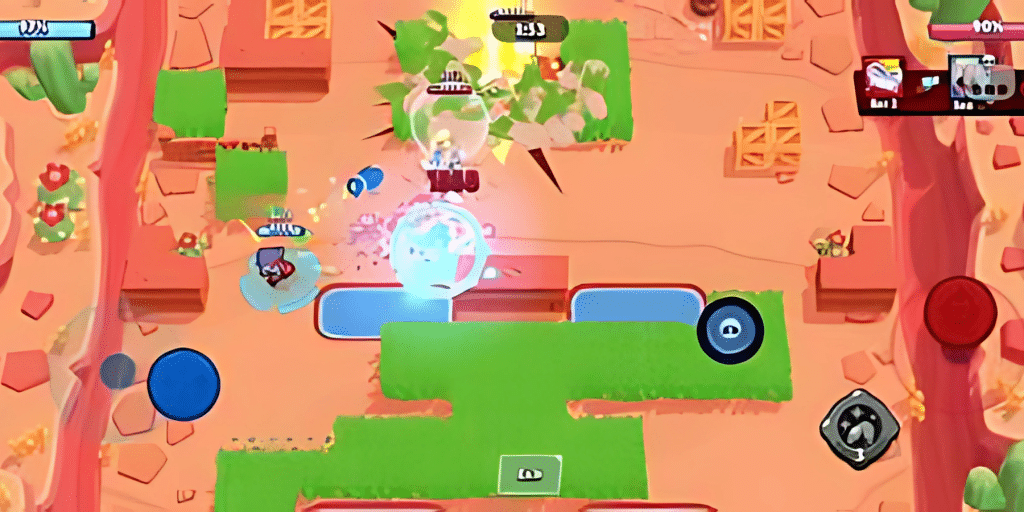
Your Super attack is crucial in Brawl Stars Kaboom Canyon, especially in modes like Heist. Supers often deal significantly more damage than regular attacks, and using them at the right time can help you break through enemy defenses or deal heavy damage to the enemy’s safe. Save your Super for critical moments, and coordinate with your teammates to maximize its impact. A well-timed Super can make all the difference.
Brawl Stars Kaboom Canyon is a map that offers a dynamic blend of open spaces, strategic cover, and challenging chokepoints. To succeed, players must make the most of the map’s terrain, position themselves wisely, and work together with their team to control key areas. Whether using throwers to attack from behind cover, leveraging bushes for surprise attacks, or timing Super attacks to deal critical damage, Kaboom Canyon demands a tactical approach. By understanding the map’s layout, playing to your brawler’s strengths, and staying adaptable, you’ll be able to outmaneuver your opponents and secure victory. With practice, Kaboom Canyon can become a map where strategy and teamwork lead to success.
Brawl Stars Kaboom Canyon Guide: Conclusion
Kaboom Canyon is a map that rewards players who can think on their feet and adapt to the shifting dynamics of the battlefield. The combination of open lanes and narrow passages forces teams to constantly evaluate their positioning, whether they’re pushing forward, defending, or setting up ambushes. In modes like Gem Grab and Siege, controlling the central area is crucial, while the outer lanes offer opportunities for sneaky attacks or retreating when necessary. By mastering the map’s layout, understanding the strengths of different brawlers, and coordinating with your team, you can make the most of Kaboom Canyon’s diverse terrain.
Success on Kaboom Canyon comes down to striking the right balance between offense and defense. Whether you’re using ranged brawlers to control the open spaces or tanks to dominate the central area, knowing when and where to engage is key. The map’s design requires constant awareness and strategic thinking to stay one step ahead of your opponents. By adapting your strategy based on the flow of the game and leveraging the terrain to your advantage, you’ll be able to turn Kaboom Canyon into a map where teamwork and smart plays lead to victory.

