 Search
 Account
 Discord


- Starr Force 01
- Starr Force 02
- Starr Force 03
- Crate Block – 14
- Space Block – 14
- Space Box – 4
- Canister Barrel – 2
- Space Fence – 32
- Space Computer – 4
- Space Computer – 2
Brawl Stars Magnetic Field Guide: Introduction
The Brawl Stars Magnetic Field map challenges players’ adaptability and strategy. With open spaces and magnetic obstacles, it requires careful positioning and timing. The magnetic fields push and pull brawlers, altering the flow of the game. These fields are not just obstacles; they play an active role in strategy, with some areas acting as traps and others offering advantages. Controlling these fields and avoiding unfavorable pulls can be key to winning.
Whether you’re playing Gem Grab, Heist, Showdown, Bounty, or Hot Zone understanding how to use the magnetic fields to your advantage, as well as how to avoid them, is key to securing victory. In Gem Grab, controlling the central area, often near the magnetic fields, becomes vital to both collecting gems and securing your team’s position. In Heist, the magnetic fields can be used to displace enemy attackers or defenders, making it harder for them to position themselves properly. Showdown requires a keen sense of timing, as brawlers are pulled into different areas of the map unexpectedly, forcing players to adapt quickly and use the environment to their advantage.
In Bounty, the magnetic fields affect the flow of the game by pushing players into open spaces or into corners where they can be easily eliminated. This requires precise movement and strategic positioning to avoid being pulled into an exposed spot. Hot Zone introduces a new layer of complexity to the Brawl Stars Magnetic Field map. Capturing the zone while being aware of magnetic forces that can push or pull players can make for intense fights. Players need to constantly adapt their strategy based on the shifting locations of the magnetic fields, making Hot Zone particularly challenging on this map.
Mastering the Brawl Stars Magnetic Field map requires players to be vigilant and adaptable, as every match will play out differently depending on the positioning of the magnetic fields. Successful players will be those who can effectively control key areas, use the magnetic fields to outmaneuver opponents, and stay one step ahead of the ever-changing environment. Balancing offensive plays with strategic retreats and knowing when to engage or disengage is critical to securing victory on this unpredictable map.
Brawl Stars Magnetic Field Guide: Map Layout and Key Features
The Brawl Stars Magnetic Field map presents a unique layout with a mix of wide open spaces and areas affected by magnetic fields. These fields, located throughout the map, can either pull or push brawlers in various directions, which directly impacts movement and positioning. The central area is particularly open, offering clear sightlines for ranged brawlers, but the magnetic fields here can disrupt strategic positioning by pulling players away from key objectives or into dangerous areas. This makes the middle of the map both a prime spot for offensive brawlers and a risky area to control without careful navigation.
On the outer edges of the Brawl Stars Magnetic Field map, players will encounter walls, crates, and other obstacles that provide cover and act as strategic advantages for brawlers focused on close-quarters combat. These areas are less affected by the magnetic fields, making them more stable for setting up ambushes or holding defensive positions. The strategic placement of these obstacles allows for more deliberate movement and offers a safe retreat for brawlers like Bull or El Primo when engaging in battle.
The key challenge on the Brawl Stars Magnetic Field map is managing the unpredictable nature of the magnetic fields. These fields can alter the flow of the game, pulling brawlers into or away from key areas like the Gem Mine in Gem Grab or the Safe in Heist. Players need to be adaptable and quick to adjust their positioning as they try to either exploit the fields to their advantage or avoid being caught in compromising positions. Timing is critical, and players must be aware of how the fields affect both their movement and their opponents’ movements.
Mastering the Brawl Stars Magnetic Field map requires players to make the most of the map’s features, balancing offensive and defensive strategies while navigating the impact of the magnetic fields. Brawlers with high mobility, such as Leon or Crow, can use the fields to their advantage, quickly moving through the map and catching enemies off guard. On the other hand, brawlers who rely more on staying in one position, like Piper or Brock, need to carefully control their placement and use the fields to either push enemies into their sights or avoid being disrupted.
Brawl Stars Magnetic Field Guide: Brawler Considerations
Choosing the right brawler for the Brawl Stars Magnetic Field map can greatly impact your team’s success. The map’s unique features, especially the magnetic fields, require players to think carefully about which brawlers will perform best in the constantly changing environment. Brawlers with mobility, strong tanky brawlers, and those with long-range capabilities all have their place on this map, but each will need to navigate the magnetic fields in different ways to be effective. Here’s a breakdown of brawler types to consider when planning your strategy.
High-Mobility Brawlers

High-mobility brawlers are excellent choices for the Brawl Stars Magnetic Field map due to their ability to quickly maneuver through the tight spaces and unpredictable magnetic fields. Brawlers like Leon, Crow, and Tara are perfect for navigating the map’s open spaces and swiftly avoiding the magnetic fields’ effects. These brawlers can use their speed and agility to capitalize on the magnetic fields by dodging the pulls and pushes and quickly repositioning to gain a tactical advantage. Their mobility allows them to avoid being trapped in unfavorable situations and take advantage of opportunities as they arise. Additionally, they can move in and out of combat, making them hard to catch and effectively controlling critical chokepoints.
Tanky Brawlers

Tanky brawlers such as El Primo, Bull and Frank are solid picks for this map due to their ability to absorb significant damage and maintain offensive pressure. These brawlers can push through the map’s chaotic magnetic fields and still dominate close-quarter combat. In the narrow corridors and chokepoints where the fields are most disruptive, these brawlers excel at forcing enemies into traps, using their durability and strength to overpower opponents. Their ability to control space in such areas is vital, especially when magnetic fields can throw off enemies, leaving them vulnerable to devastating attacks. These brawlers can also provide great support to teammates by soaking up damage and holding the line while more mobile allies maneuver around the map.
Long-Range Brawlers

Long-range brawlers like Piper, Brock, and Barley can provide strong support but must be cautious on the Brawl Stars Magnetic Field map. The magnetic fields can disrupt their positioning, pulling them out of safe spots or into danger. These brawlers excel in open spaces where they can maintain a clear line of sight. It’s crucial to be aware of the fields and plan attacks from safe distances to avoid being pulled into compromised positions. With their range advantage, they can harass enemies but must be quick to reposition when the fields threaten to displace them.
Understanding how different brawlers interact with the Brawl Stars Magnetic Field map is essential for developing an effective strategy. High-mobility brawlers can use the shifting magnetic fields to their advantage, tanky brawlers can control choke points and force enemies into difficult situations, and long-range brawlers must carefully position themselves to avoid being pulled into danger. By selecting the right brawlers based on their mobility, durability, and range, you can ensure your team is well-equipped to handle the unique challenges posed by this dynamic map. Adapt to the magnetic fields, work closely with your team, and use your brawlers’ strengths to secure victory on the Magnetic Field map.
Brawl Stars Magnetic Field Guide: Mode-Specific Strategies
The Brawl Stars Magnetic Field map presents a dynamic challenge, requiring quick thinking and adaptability. Featuring open spaces, narrow corridors, and magnetic fields that push and pull brawlers, this map demands precise positioning and timing. Whether playing Gem Grab, Heist, Showdown, Bounty, or Hot Zone, mastering how the magnetic fields interact with your brawler’s movement is key. The map encourages tactical play and offers opportunities to outsmart opponents if you know how to use the fields to your advantage.
Gem Grab

In Gem Grab on the Brawl Stars Magnetic Field map, controlling the central area is key, but the magnetic fields add unpredictability. High-mobility brawlers like Leon or Crow can quickly adapt to these shifting dynamics, escaping danger or seizing opportunities. Team coordination is crucial to control chokepoints and manage the influence of the fields. If an enemy is pulled into the magnetic field, it can create openings for your team, but be cautious, as opponents can also use them to trap you.
Heist

In Heist, positioning is vital. Long-range brawlers like Brock or Piper can control open areas while dealing damage to the Safe, avoiding the magnetic fields’ effects. Defenders can use the fields to push attackers away or trap them. Attackers should stay mobile, using the magnetic fields to quickly reposition and coordinate with teammates to break through defensive lines and secure damage on the Safe.
Showdown

In Showdown, staying on the edges of the Brawl Stars Magnetic Field map is key to avoiding being pulled into the chaotic central areas. The magnetic fields can push you into danger or away from it, so timing engagements is essential. Stealthy brawlers like Leon can use the fields to sneak past opponents and set up ambushes. Control when and where to fight, using the magnetic fields to your advantage to shift positioning.
Bounty

In Bounty, positioning is crucial due to narrow spaces and magnetic fields. Long-range brawlers like Piper should avoid the fields’ effects, while close-range brawlers like Bull can use the fields to pull enemies into favorable positions. Awareness of your positioning is essential, and controlling key areas while adapting to the shifting dynamics of the magnetic fields can turn the tide in your favor.
Hot Zone

In Hot Zone, the Brawl Stars Magnetic Field map makes controlling the area more difficult. Brawlers with high mobility, like Leon or Crow, can quickly reposition when pushed out of the Hot Zone. Teamwork is vital to maintain control, especially when the fields push you out. Stay aware of the shifting dynamics and work together to secure and hold the Hot Zone to win the match.
The Brawl Stars Magnetic Field map presents a unique challenge for all game modes, demanding players use quick reflexes and strategic thinking to adapt to its ever-changing dynamics. Whether it’s leveraging the magnetic fields to your advantage or avoiding their disruptive effects, mastering the flow of the map is crucial to success. By carefully selecting brawlers, coordinating with your team, and staying aware of the fields’ impact, you can outplay opponents and secure victory on this dynamic and unpredictable battleground.
Brawl Stars Magnetic Field Guide: Tips and Tricks
The Brawl Stars Magnetic Field map offers many strategic opportunities and challenges that require quick thinking and adaptability. With its unique layout and magnetic field mechanics, success on this map hinges on how well you use your surroundings, timing, and brawler abilities. Here are some essential tips and tricks to help you maximize your potential and outsmart your opponents.
Use Cover on Your Side
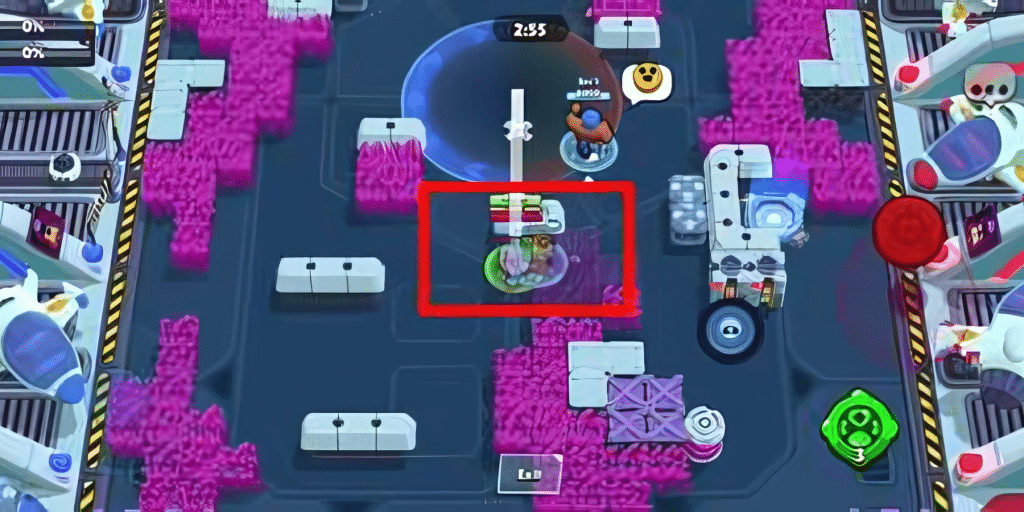
One of the most important aspects of the Brawl Stars Magnetic Field map is using cover effectively. There are several bushes scattered near the Hot Zones that can be used to your advantage. These bushes provide excellent hiding spots, allowing you to heal or ambush your opponents. Stay hidden while recovering health if you’re being chased, then pop out at the right moment to surprise your enemies. It’s also an excellent tactic to take advantage of any vision-blocking cover when engaging in combat, making it harder for enemies to target you while you plan your next move.
Destroy the Enemies’ Cover
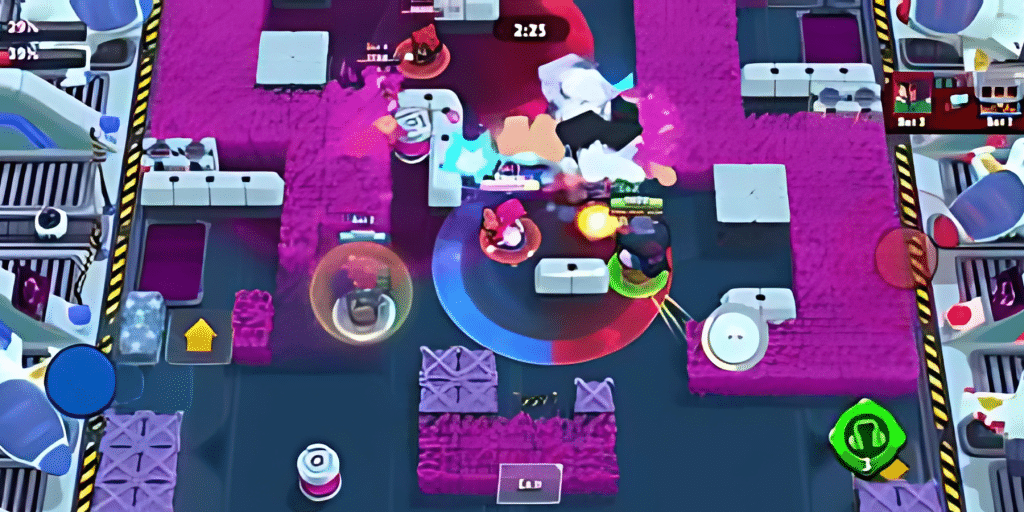
Destroying your enemies’ cover can be an excellent way to gain the upper hand on this map. Use your Super or gadgets to break down walls and bushes in the center area of the map or near the Hot Zones. This denies your opponents the opportunity to hide, making them more vulnerable to attacks and potentially forcing them into the open. If you manage to destroy key cover points, it can disrupt their strategy, especially if they rely on cover for surprise attacks. Clearing these obstacles gives you greater control of the map and opens up fresh opportunities for your team to take the advantage.
Teleporter
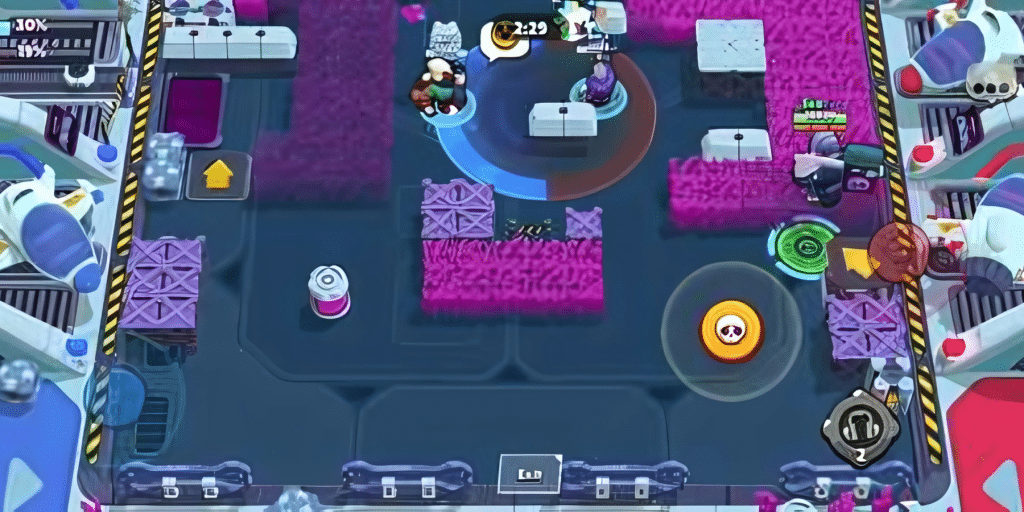
The Brawl Stars Magnetic Field map features two-way teleporters that can significantly change the flow of the game. These teleporters allow you to quickly move from one side of the map to the other, providing a fast means of travel. They can be particularly useful for flanking your enemies or escaping a tough situation. However, be cautious when using them; your opponents might be waiting on the other side, ready to ambush you. It’s important to coordinate with your team when using teleporters to ensure you aren’t caught off guard. The key is timing—using them when the enemy’s attention is elsewhere can help you outmaneuver them and take advantage of the element of surprise.
Mastering the Brawl Stars Magnetic Field map requires more than just understanding its layout; you need to make use of its features to your advantage. Whether it’s utilizing cover to surprise your enemies, destroying their cover to weaken their defense, or using teleporters to reposition quickly, these strategies can give you the edge in every mode. Always adapt to the shifting battlefield, and keep your opponents guessing with well-timed attacks and movements. By following these tips, you’ll be well on your way to dominating the Magnetic Field map and securing victories across all game modes.
Brawl Stars Magnetic Field Guide: Conclusion
The Brawl Stars Magnetic Field map offers a unique challenge for players, where positioning, map awareness, and the use of magnetic fields are key factors in securing victory. With open spaces, chokepoints, and obstacles scattered across the map, players must constantly adapt to shifting dynamics and make the most of their brawler’s strengths. Whether you’re playing Gem Grab, Heist, Showdown, or Bounty, understanding the map’s features and using them to your advantage will give you a significant edge over the competition. Mastering the Magnetic Field map requires a balance of strategic positioning, quick thinking, and teamwork, making it one of the most exciting and unpredictable maps in Brawl Stars.
In conclusion, the Brawl Stars Magnetic Field map offers a distinctive and ever-changing battlefield that demands quick thinking, adaptability, and teamwork. Its unique combination of magnetic fields and varied terrain creates both opportunities and challenges for players, making it essential to master positioning and timing. Whether you’re in the chaos of Gem Grab, the strategy of Heist, or the intense duels of Showdown, leveraging the map’s features will give you a tactical advantage. The map’s dynamic nature encourages players to stay on their toes and constantly adjust their strategies, making every match a thrilling experience. With practice, you’ll learn to control the magnetic fields, outsmart opponents, and emerge victorious in one of Brawl Stars’ most engaging maps.

