 Search
 Account
 Discord


- Arcade 01
- Arcade 02
- Arcade Block
- Wooden Box
- Road Barrel
- Road Arrow Sign
- Bush
Brawl Stars Subway Turfers is a community-designed map featured in the Heist event. It challenges players with narrow pathways, layered cover, and tight angles that encourage fast-paced action and creative flanking. The layout rewards teams that coordinate well on both offense and defense, especially when utilizing throwers or mobility-based Brawlers.
Brawl Stars Subway Turfers Guide: Map Layout
Brawl Stars Subway Turfers features a fast-paced layout that blends structured mid-lane defense with side-lane ambush potential. Its open design and narrow bush paths create a balanced battleground for both defensive setups and aggressive flanking plays. Here’s how the map is structured:
| Center Lane |
|---|
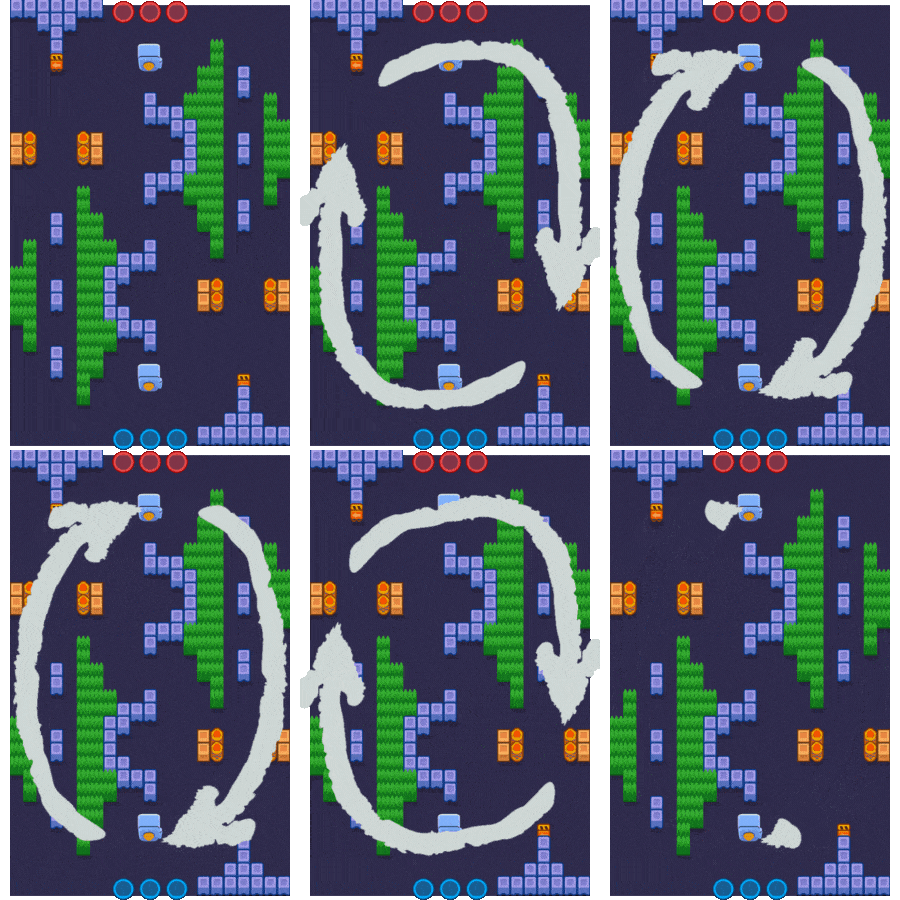 A stream of solid walls runs through the middle of the map, with only a small break in the center. These walls create natural choke points and are ideal for defending or slowing down enemy pushes. |
| Side Areas |
|---|
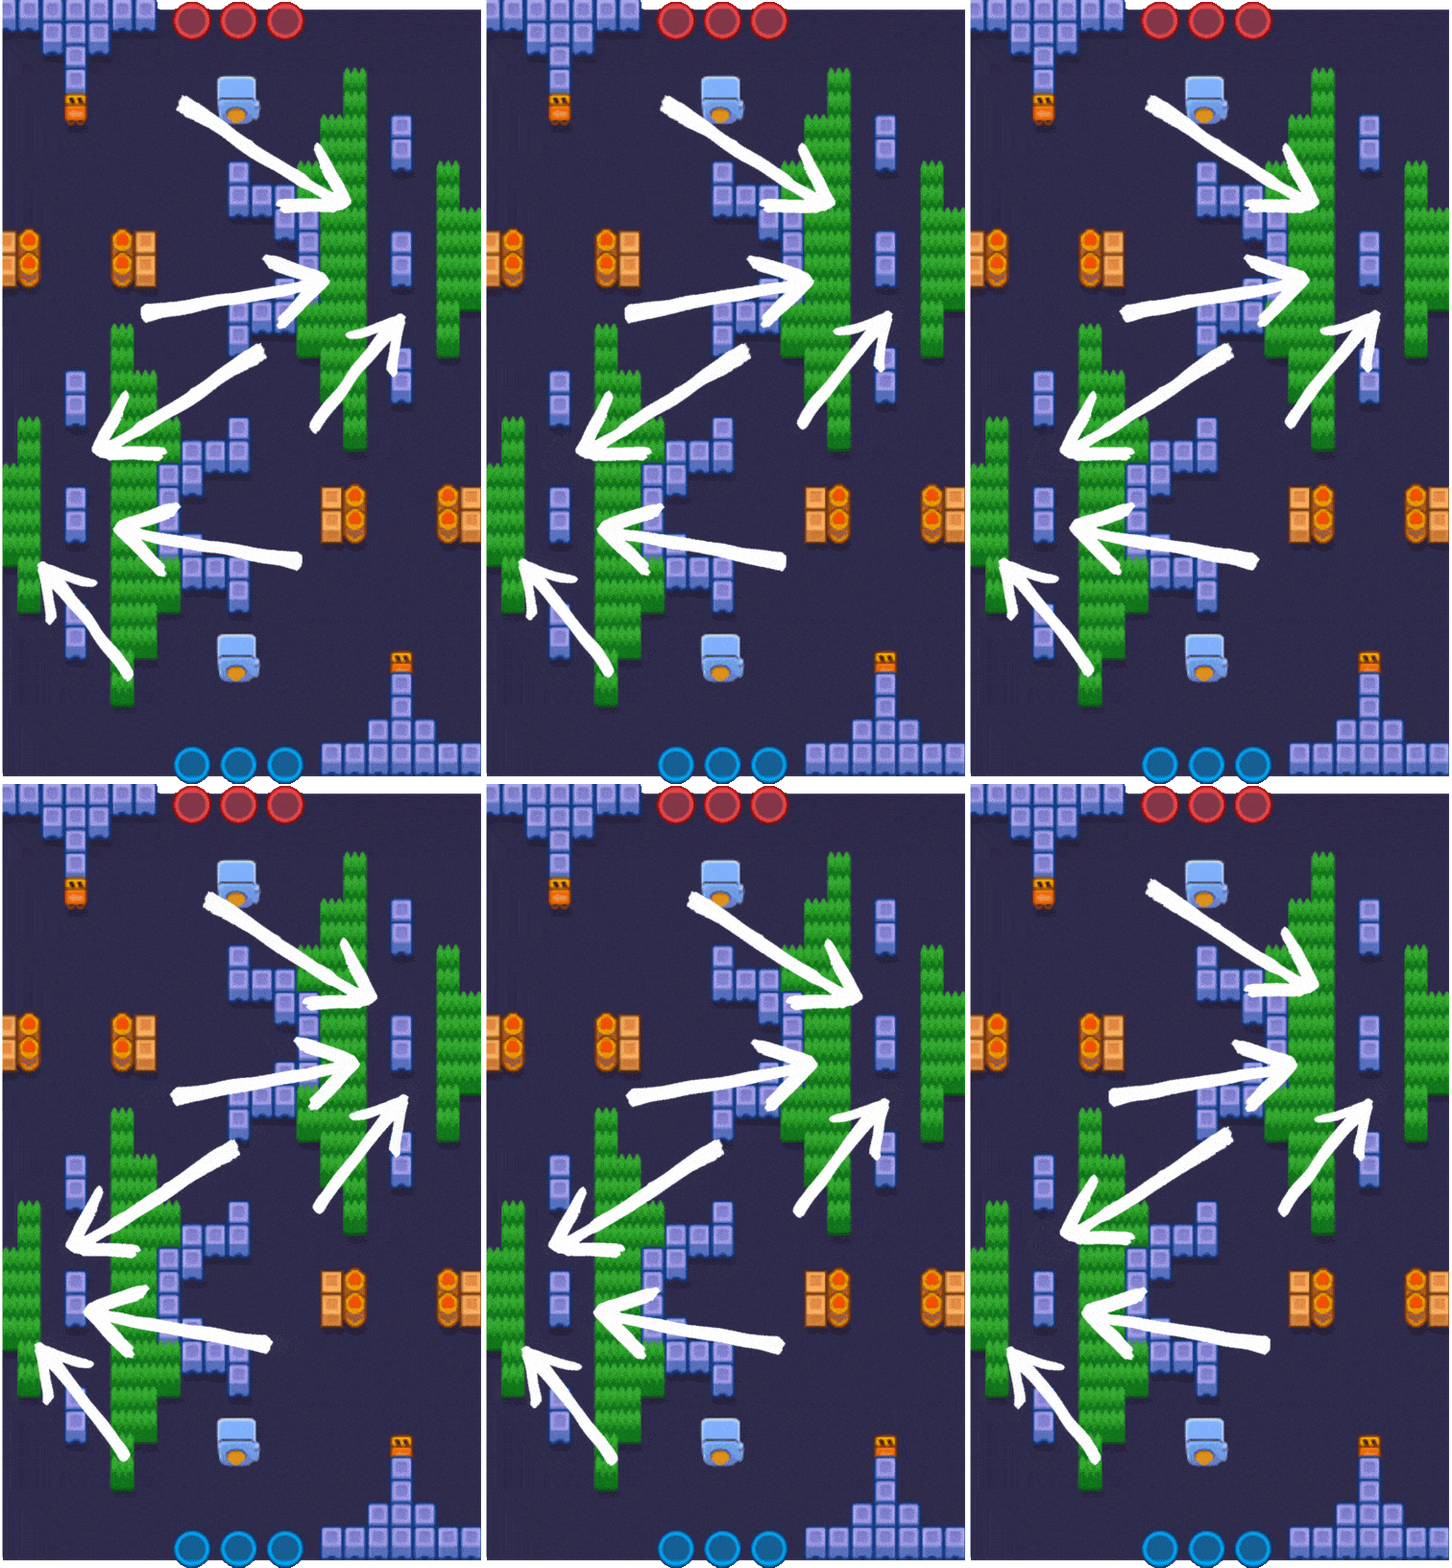 Flanking each side of the central wall path is a long stretch of bushes, perfect for ambushes or stealthy approaches toward the enemy safe. These bush lanes support surprise attacks from sneaky or high-burst Brawlers. |
Brawl Stars Subway Turfers Guide: Best Brawlers
| Brawler | Role | Why They’re Good on This Map |
|---|---|---|
 Colt | Damage Dealer | Can shred through the center wall and safe from range; great with Silver Bullet and Speed Gear. |
 Brock | Damage Dealer | Excels in the open layout; can break walls and poke from a distance safely. |
 Bull | Tank or Burst Attacker | Ideal for sneaking through bushes and dealing huge damage up close to the safe. |
 Rico | Support or Control | Takes advantage of wall lanes for high bouncing damage and lane control. |
 Barley | Thrower | Dominates narrow choke points and can deal safe damage behind walls. |
  Stu | Assassin | Quick for flanking, retreating, and pressuring lanes with Super mobility. |
 Darryl | Tank or Roller | Rolls into the safe area easily via bushes and walls; fast and destructive when reaching the backline. |
 8-Bit | Support or Damage | High damage and a damage-boosting turret make him deadly when positioned near the enemy safe. |
 El Primo | Tank or Initiator | Great for surprise bush jumps and close-range bursts on the safe. |
 Gray | Utility or Support | Can teleport himself or teammates past wall lines for quick access to the safe. |
Brawl Stars Subway Turfers Guide: Tips
Brawl Stars Subway Turfers is a Heist map that rewards strategic positioning, careful use of walls, and exploiting lane dynamics. Whether you’re breaking through defenses or setting up powerful turret zones, understanding the map’s layout gives your team a major edge.
Sharpshooters Rule Divided Lanes
Sharpshooters can exploit the two divided lanes since they are not very obstructed. This allows consistent pressure on both enemy lanes.
Throwers Abuse Curved Walls
Throwers can lob attacks over the curvy center walls safely while being shielded. It’s ideal for turrets too—Penny’s or Bea’s Gadgets shine here.
Use Speed Gear in Bush Lanes
Equip Speed Gear on Brawlers using the long bush lanes for flanks. It lets you surprise enemies quickly or reach the enemy safe faster.
Break Mid Walls for Fast Access
Brawlers like Colt, Brock, or Bull can destroy the central wall stream. This opens a fast lane to the enemy safe and disrupts defenses.
Defend from Behind the Wall
Defenders can station behind the curvy middle wall to delay pushes while staying protected, using long-range shots or Supers for control.
Brawl Stars Subway Turfers Guide: Conclusion
Brawl Stars Subway Turfers challenges players to make the most of its long central walls and open side lanes. Success on this map often comes down to controlling key sightlines, placing pressure with sharpshooters or throwers, and maintaining lane balance. With smart coordination and awareness of wall-based cover, you can dominate both defense and offense in this uniquely structured Heist battlefield.
Frequently Asked Questions (F.A.Q)
❓What type of Brawlers work best on Subway Turfers?
Sharpshooters and throwers thrive on Brawl Stars Subway Turfers. The central wall offers protection and a great spot to pressure enemies from range. Throwers like Barley or Tick can safely attack over the walls, while sharpshooters like Belle or Piper can control the more open side lanes.
❓How important is the center lane on this map?
Very important. The center lane acts as a defensive checkpoint due to the long stretch of wall, which allows throwers and turret-based Brawlers to defend or attack the safe with cover. However, flanking through the side lanes is still key to applying pressure.
❓Can tanks succeed in this map?
Tanks can be effective if supported properly. While the map is relatively open, tanks can use the bush-lined flanks and wall cover to close distance. Brawlers like Bull or Darryl can roll in and burst the safe if enemies are distracted or cleared.
❓What is the most common strategy on Subway Turfers?
A balanced team with one sharpshooter, one thrower, and one aggressive flanker works well. One player should control the center, another should handle chip damage and zone denial, and the third should find opportunities to flank or rush the safe.

