 Search
 Account
 Discord



- Starr Toons 01
- Turquoise Block
- Bush
- Speed Tile
Brawl Stars Temple of Vroom is an official map featured in the Knockout event. This map challenges players with its tight pathways, cover-heavy zones, and strong emphasis on positioning and survival. With no respawns in Knockout, every move counts, and the layout of Temple of Vroom encourages careful peeking, strategic gadget use, and team synergy. Success on this map comes from controlling key lanes, punishing isolated enemies, and timing Supers for game-changing plays.
Brawl Stars Temple of Vroom Guide: Map Layout
Brawl Stars Temple of Vroom is a map built around movement and precise positioning. With speed tiles, narrow middle lanes, and pressure-heavy zones, players must make quick decisions and leverage map features to gain the upper hand. Each section plays a unique role in shaping the round’s flow.
| Speed Flanks |
|---|
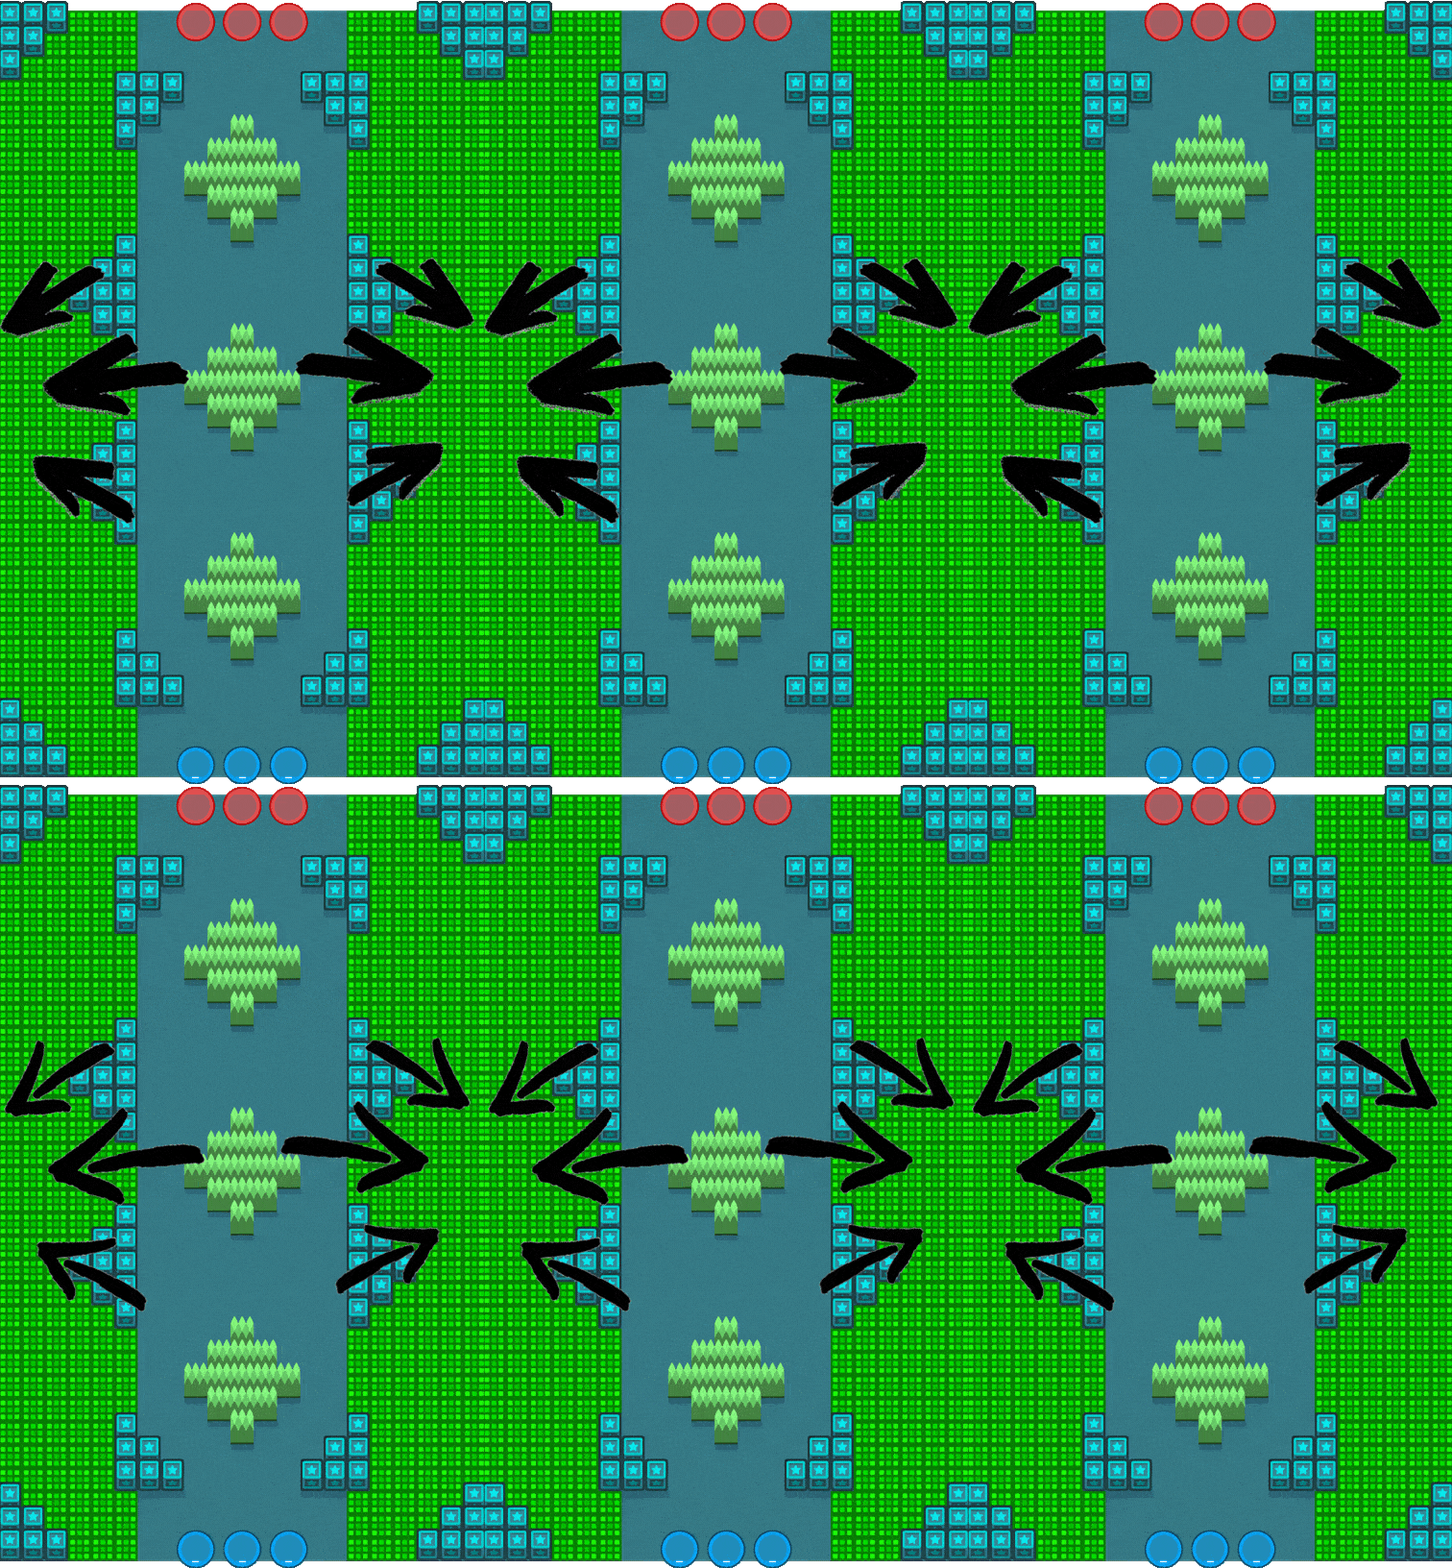 Located on both sides of the map, the speed tiles offer rapid rotation opportunities. These flank routes are ideal for assassins, tanks, or sneaky plays that catch enemies off guard. Smart use of speed flanks can quickly shift control or close distance for a surprise elimination. |
| Middle Lane |
|---|
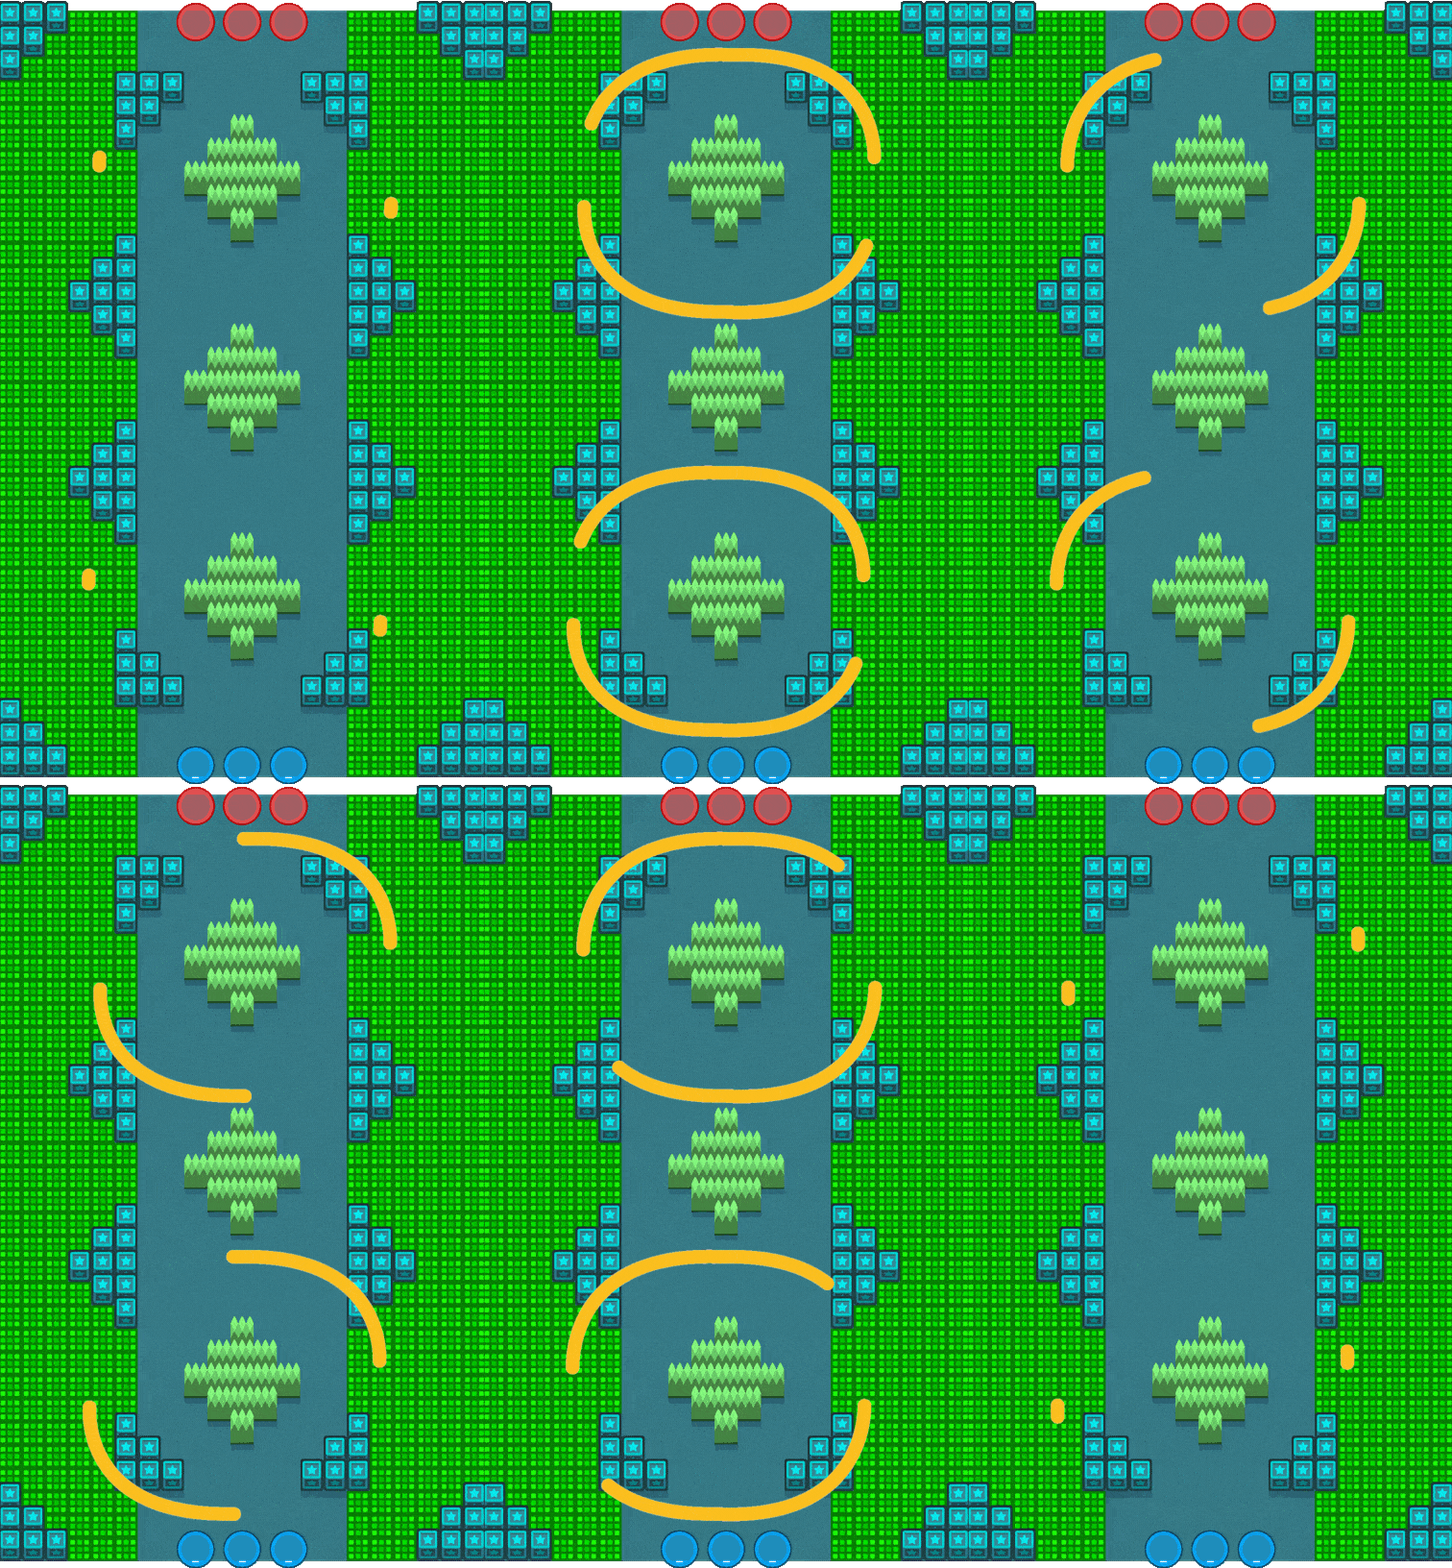 The middle lane is a straight, open path that connects both spawn areas. It’s a high-risk zone that often becomes a sniper’s playground. Long-range Brawlers or sharpshooters can control this area early to pick off opponents, but it’s also vulnerable to quick flanks. |
| Central Zone |
|---|
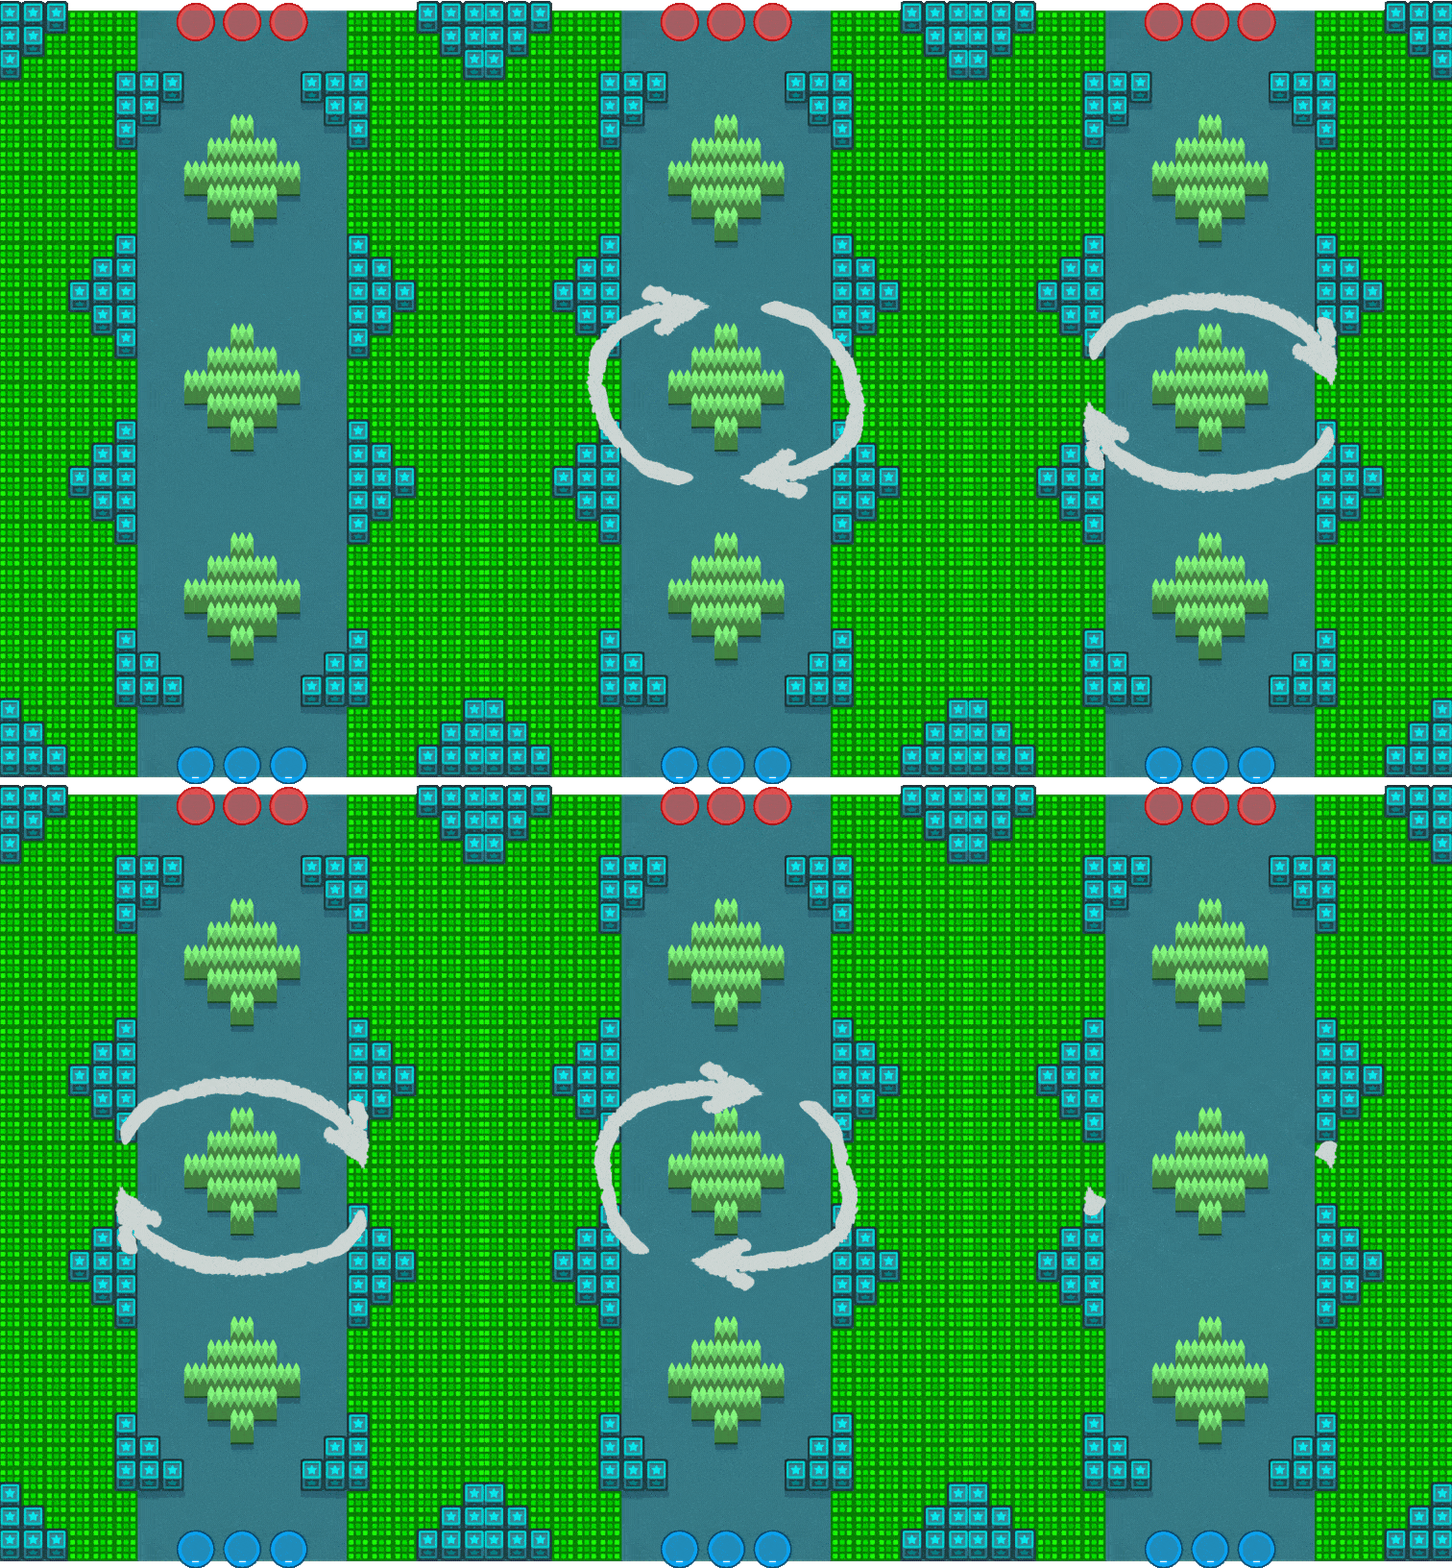 The central zone is flanked by obstacles and bushes, offering both cover and ambush opportunities. It’s the map’s most contested area, where teams typically clash after scouting. Controlling this zone gives your team superior sightlines and forces the enemy to play reactively. |
Brawl Stars Temple of Vroom Guide: Best Brawlers
| Brawler | Role | Why They’re Effective on Temple of Vroom |
|---|---|---|
 Piper | Long-Range Sniper | Dominates mid lane with high burst damage from afar. |
 Nani | Precision Damage | Excels at long-range poke and high-damage Super snipes. |
 Rico | Bouncy Zoner | Takes advantage of tight walls and angles for pressure. |
 8-Bit | Damage Amplifier | Strong lane presence and team damage boost with turret. |
 Colt | Sharpshooter | Can shred enemies quickly across open lanes. |
 Angelo | Control Sniper | Applies pressure and controls zone with arc shots. |
 Brock | Burst Damage | Provides long-range poke and area denial with Super. |
 Sprout | Thrower or Control | Blocks paths and chips down enemies safely behind cover. |
 Barley | Splash Thrower | Great for holding enemies behind walls. |
 Dynamike | Burst Thrower | High damage behind cover; risky but rewarding. |
 Grom | Wall Piercer | Can attack through obstacles to control tight zones. |
Brawl Stars Temple of Vroom Guide: Tips
Brawl Stars Temple of Vroom offers fast, tactical Knockout rounds with open sightlines and narrow flanks. These tips will help you capitalize on the map’s layout, secure positioning, and outplay opponents using range, timing, and control.
Use Long-Range Brawlers for Lane Control
Piper, Nani, Rico, 8-Bit, Colt, Angelo, and Brock excel in the open areas of the map. Use their range to pick off enemies from a safe distance.
Throwers Are Great Behind Cover
Barley, Tick, Sprout, Grom, and Dynamike can lob attacks over walls to control chokepoints and pressure enemies from safety.
Use Speed Flanks for Surprise Pressure
Take advantage of the speed tiles on the sides to flank the enemy or reposition quickly. Tanks or assassins can use them for aggressive plays.
Hold the Central Zone Carefully
The center area is crucial. Use bushes and walls to peek safely, deny enemy vision, and slowly push forward without overcommitting.
Control Middle Lane with Sharpshooters
If your team has strong long-range damage, take early control of the middle lane to zone out enemies and punish overextending opponents.
Use Walls to Your Advantage
Throwers and ricochet Brawlers like Rico benefit heavily from wall usage—position carefully and force your opponents into difficult angles.
Brawl Stars Temple of Vroom Guide:Conclusion
Brawl Stars Temple of Vroom rewards patience, accuracy, and smart positioning. Use the long-range lanes to your advantage, pressure from behind cover, and make use of speed flanks to outmaneuver enemies. Team coordination and timing your engagements are essential to take the win without losing lives early.
Frequently Asked Questions (F.A.Q)
❓What’s the most important area to control?
The central zone. It offers vision, positioning advantage, and lets you collapse on flanks when needed.
❓Are speed tiles worth using aggressively?
Yes—especially for flankers or assassins like Edgar or Fang. They allow fast repositioning, but use with caution.
❓Are snipers or throwers better on this map?
Both are viable. Snipers dominate open lanes, while throwers control cover-heavy choke points and defend key areas.
❓Can wall breakers help here?
Sometimes. Breaking specific walls can eliminate enemy cover, but don’t overdo it or you’ll expose your own team.
❓What kind of team comp works best?
A mix of one long-range Brawler, one thrower or control Brawler, and a flexible support or assassin is often ideal.

