 Search
 Account
 Discord


- Arcade 01
- Arcade 02
- Arcade Block – 14
- Yellow Arcade Block – 8
- Wooden Box – 2
- Road Barrel – 6
- Metal Fence – 19
- Rope Fence – 55
- Road Arrow Sign – 4
- Bush – 34
- Lake – 1
- Launch Pad – 4
Brawl Stars Massive Attack Guide: Introduction
The Brawl Stars Massive Attack map offers a unique and dynamic battleground that requires players to strike a balance between offense and defense. Its design features wide open spaces, making it an ideal map for both long-range brawlers and aggressive attackers. While the central area offers a large, open field for intense combat, the edges are lined with walls, bushes, and obstacles that allow players to use cover for strategic positioning and ambushes. These natural barriers create opportunities for sneaky attacks or retreats, and understanding how to use them effectively can be the key to controlling the flow of the game.
The central area of the Brawl Stars Massive Attack map often becomes a key battleground, particularly in Hot Zone mode. Controlling this space early on gives your team a significant advantage, as it directly impacts your ability to hold the zone and accumulate points. However, the wide open nature of the central area also makes it a hotspot for enemy attacks, so positioning and timing are essential. If you’re playing a close-range brawler, it’s crucial to use nearby obstacles for cover while staying mobile, while long-range brawlers can take advantage of the open sightlines to attack enemies from a distance and control the central area more safely.
The outer edges of the Brawl Stars Massive Attack map provide a different kind of advantage in Hot Zone mode, offering plenty of walls and bushes that players can use to gain an upper hand. These areas are perfect for setting up defensive positions or flanking your opponents, especially when controlling the Hot Zone becomes more intense. Hiding in bushes or taking cover behind walls gives you the element of surprise and can force enemies to approach carefully, opening up opportunities for you and your team to push forward and maintain control of the zone.
Ultimately, the success on the Brawl Stars Massive Attack map hinges on your ability to adapt to its open spaces and strategic obstacles. Mastering the central areas, using walls and bushes effectively, and understanding when to engage or retreat will give you the upper hand. Whether you prefer playing aggressively or defensively, positioning, map awareness, and timing will determine your effectiveness in controlling the battlefield. By understanding the map’s layout and using its features to your advantage, you can outplay your opponents and secure victory in a variety of game modes.
Brawl Stars Massive Attack Guide: Map Layout and Key Features
The Brawl Stars Massive Attack map is defined by its open spaces, which encourage long-range brawlers to utilize their advantage. These wide-open zones allow players to move freely, but they also expose them to enemies from different directions. The central area of the map often becomes a focal point for conflict, where teams battle for control and try to dominate the flow of the game. The map also features several chokepoints that can be used to limit enemy movement, which is essential for defensive brawlers.
Cover is essential on this map, and there are several walls and bushes scattered throughout. The outer edges of the map have a mix of destructible and indestructible obstacles, which can be used for tactical positioning. The bushes provide a great opportunity for stealthy brawlers to hide and launch surprise attacks, while the walls help brawlers with close-range combat to avoid incoming damage. These features also make it easier to control certain areas of the map, such as cornering enemies or blocking their movements.
A critical element of this map is the importance of controlling the central region. It acts as a battleground where teams can push for objectives and gain an advantage. The central area is often where the most intense action happens, so it’s important to position your team to either dominate this space or control the edges for flanking opportunities. Brawlers who can control space in this area, especially those with high mobility or long-range attacks, can turn the tide of the match in their favor.
Overall, the Brawl Stars Massive Attack map requires a mix of strategic positioning, timing, and teamwork. Players must balance aggressive pushes with careful retreats, leveraging the map’s open spaces and cover effectively. The central area is often the key to victory, but controlling the outer edges is just as crucial for setting up ambushes and controlling the flow of the game. Success in Hot Zone or other modes on this map hinges on a team’s ability to adapt to the ever-changing battlefield, control the important areas, and work together to outsmart the enemy.
Brawl Stars Massive Attack Guide: Brawler Considerations
When choosing a brawler for the Brawl Stars Massive Attack map, it’s essential to consider factors like range, mobility, and durability. The wide-open spaces and strategic placement of obstacles offer various advantages and challenges for different brawlers. Understanding how each brawler interacts with these elements can significantly impact the game’s outcome.
Long-Range Brawlers

Long-range brawlers like Piper, Brock, and Barley are excellent choices on the Brawl Stars Massive Attack map. With the expansive open spaces, these brawlers can deal substantial damage from a distance while keeping themselves out of harm’s way. They can control sightlines and prevent enemies from pushing forward, all while staying far enough away to avoid taking significant damage. For these brawlers, maintaining a clear line of sight is crucial, so they should position themselves where they can take advantage of the space without being flanked. It’s important to play cautiously, repositioning as necessary to ensure they don’t get caught off-guard by enemies with strong mobility.
Tanky Brawlers

Tanky brawlers like El Primo, Bull and Frank can thrive on the Brawl Stars Massive Attack map, especially in defensive roles. With high health and the ability to deal massive damage in close combat, they are perfect for controlling chokepoints and defending key areas. These brawlers are great at soaking up damage and holding ground, allowing their teammates to focus on offensive plays. However, these brawlers should be mindful of their vulnerabilities to long-range attacks. While their strength lies in holding areas and pushing forward when needed, they must remain cautious of ranged brawlers who can deal damage from afar.
High-Mobility Brawlers

High-mobility brawlers like Crow and Leon are also valuable picks for the Brawl Stars Massive Attack map. Their ability to move quickly and take advantage of the open spaces makes them excellent for surprise attacks and flanking enemy positions. These brawlers can disrupt enemy strategies, quickly shifting from one area to another to create confusion and capitalize on vulnerabilities in the opposing team’s defense. Their agility allows them to dodge incoming fire and outmaneuver slower, tankier brawlers. High-mobility brawlers can be particularly effective at harassing enemy backlines and creating chaos during crucial moments, making them a valuable asset in fast-paced matches.
Understanding how these brawlers interact with the map’s open spaces, obstacles, and strategic choke points is key to maximizing their potential. Depending on your playstyle and team composition, selecting the right brawler can give you a significant advantage in Brawl Stars Massive Attack.
Brawl Stars Massive Attack Guide: Hot Zone on Massive Attack

In Hot Zone mode on the Brawl Stars Massive Attack map, controlling the zones becomes the main focus of the game. The map’s open spaces combined with obstacles create strategic opportunities for both offense and defense. The central area often becomes a key battleground, and teams need to stay vigilant, as securing the zone is vital for victory. High-mobility brawlers like Leon or Crow are extremely effective, as they can quickly rotate between zones, contest areas, and evade attacks. On the other hand, tanky brawlers like Bull or El Primo excel at holding down areas and absorbing incoming damage, giving their team more breathing room to secure a lead.
Controlling the outer edges of the Brawl Stars Massive Attack map is just as important as the center. Teams can use the destructible and indestructible walls to control sightlines and defend their position. Brawlers with area-of-effect (AoE) abilities, such as Barley or Sprout, can be useful in pushing enemies out of the zone and defending large sections at once. Setting up ambushes with brawlers who can hide in the bushes or behind walls is a great tactic to surprise opponents attempting to contest the zone.
Since the Hot Zone mode requires consistent control of the zones, teamwork is essential. It’s critical to have good communication with teammates to keep opponents from pushing you out of the zone. A key strategy is to maintain a presence in the zone while controlling key points of entry to prevent enemies from flanking or sneaking in. With proper coordination, teams can shift their focus between contesting the central zone and defending other high-traffic areas, balancing between offense and defense to maintain a strong position throughout the match.
Ultimately, Hot Zone on the Brawl Stars Massive Attack map requires players to adapt quickly to the ever-changing dynamics of zone control, utilizing the map’s features, cover, and positioning to gain an edge over the opposition. Teams that understand the map’s flow, control the central area, and keep the pressure on enemies will be able to claim victory.
Brawl Stars Massive Attack Guide: Tips and Tricks
The Brawl Stars Massive Attack map presents players with a mix of open spaces, obstacles, and strategic elements that can turn the tide of battle if utilized effectively. When playing Hot Zone, mastering the layout and making use of key features like cover, fences, and Jump Pads is crucial for success. This map offers a variety of opportunities for ambushes, quick movements, and positioning that can outplay opponents. To maximize your chances of securing the Hot Zones and gaining an advantage over the enemy team, here are some essential tips and tricks to keep in mind.
Use the Bushes on the Side

The bushes on the side of the Brawl Stars Massive Attack map offer a great opportunity for strategic plays. These bushes provide cover and allow you to approach the Hot Zone without being seen. You can use them to sneak up on enemies who are focused on capturing the Hot Zone or fighting in the center. If you’re looking to ambush an opponent trying to capture the Hot Zone, the bushes are an ideal place to hide and launch a surprise attack. Taking advantage of these hidden areas can help you outsmart your opponents and maintain the element of surprise.
Attack Goes Through Fences

One key feature of the Brawl Stars Massive Attack map is that both your team’s and the enemies’ attacks can pass through the fences scattered across the map. While this might be beneficial for long-range brawlers looking to deal damage from behind cover, it also presents a danger when trying to capture or defend a Hot Zone. Be extra cautious when positioning yourself near the fences, as enemies can attack you even if you’re behind them. Always keep an eye on the area and avoid standing too close to these fences while trying to control a Hot Zone, as it gives enemies the opportunity to deal damage from a distance.
Clear Out the Fences and Walls on Your Side

Clearing out fences and walls on your side of the map can be a crucial tactic to gain faster access to the Hot Zones. By destroying the obstacles, you can quickly maneuver through the map and gain control of the Hot Zones. However, make sure not to destroy the fences or walls on your opponent’s side of the map, as this can give them an easy path to counter your control of the Hot Zones. Use brawlers with destructive abilities or gadgets to clear out these obstacles strategically, ensuring you can outpace your opponents in securing key areas of the map.
Jump Pads
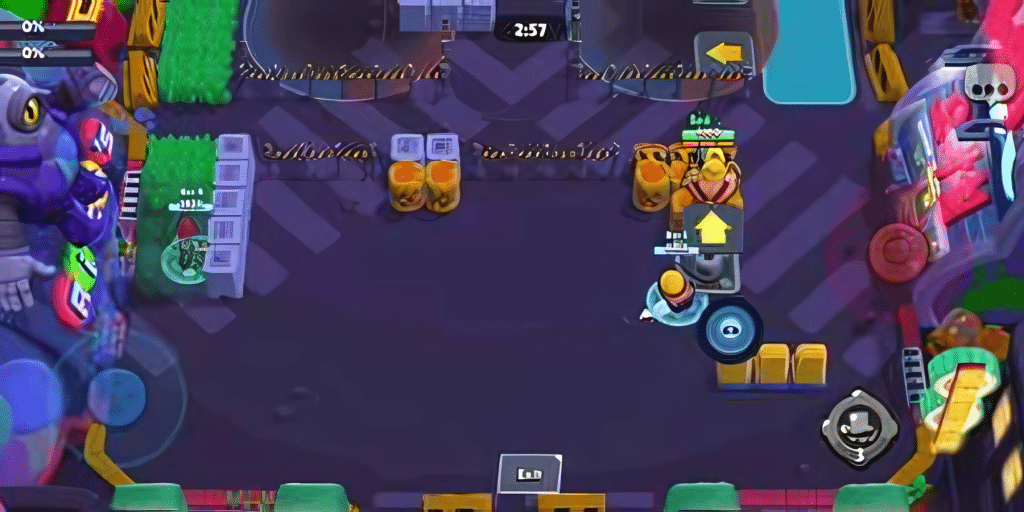
Jump Pads are a useful tool for quickly getting to a Hot Zone in Brawl Stars Massive Attack. They provide a quick method of transportation, helping you reach the Hot Zone faster than your enemies, especially in the early stages of the match. If you’re playing as a heavyweight brawler, it’s often best to head to the Hot Zone first to help secure it for your team. Jump Pads give you an edge in terms of mobility, allowing you to quickly reinforce areas that may be under attack. Be mindful of the timing, as enemies may also use the Jump Pads, so always be prepared for a counterattack once you land.
Focus on One Hot Zone

A key strategy for Hot Zone mode on the Massive Attack map is focusing on capturing one Hot Zone first. Trying to hold both at once can spread your team too thin, making it harder to defend or capture either zone. It’s more effective to commit to one zone, then shift focus to the second once it’s secured. This allows you to establish control and prevent the enemy from gaining ground, improving your chances of winning. Teamwork and communication are crucial to ensure everyone is aligned in securing the first Hot Zone.
Brawl Stars Massive Attack Guide: Conclusion
The Brawl Stars Massive Attack map is a dynamic and expansive battlefield, offering both opportunities and challenges. With wide open spaces, chokepoints, and various cover options, this map requires players to be adaptable and strategic in their approach. Teams must be quick to control key areas, such as the central zone, while being mindful of the enemy’s movements and potential flanking tactics. The map’s layout rewards players who can make use of cover, but also punish those who fail to position themselves well, especially when facing off against ranged brawlers.
In modes like Hot Zone, Heist, and Bounty, positioning is critical. The central area often becomes a hotspot for intense battles, and success often depends on controlling this space. Players must decide whether to focus on capturing one Hot Zone or spread their efforts across both. Long-range brawlers, like Piper or Brock, excel in the wide-open areas, while tankier brawlers, such as Bull and Frank, are effective at holding chokepoints or leading pushes. The map also has destructible fences and walls that can be cleared to quickly access key areas, giving players a chance to advance or disrupt the enemy’s movements.
Cover is essential on the Brawl Stars Massive Attack map, with both bushes and walls scattered throughout. The edges of the map offer more opportunities for stealthy plays, where brawlers can hide and ambush enemies trying to capture the Hot Zones. However, players must also be cautious of the attacking opportunities that the destructible elements create. For example, fences can be passed through by attacks, so it’s important to stay alert and avoid exposing yourself to enemy fire when hiding behind them.
To succeed on the Brawl Stars Massive Attack map, communication and teamwork are essential. It’s crucial for players to coordinate their actions, especially when deciding which Hot Zone to focus on first. Trying to capture both Hot Zones simultaneously can spread your team too thin, making it difficult to maintain control over either. By concentrating efforts on one zone and then moving on to the other, players can steadily build an advantage and keep the pressure on the enemy. Strategic use of cover, timing, and positioning will determine whether a team can dominate the Massive Attack map and secure the victory.

