 Search
 Account
 Discord


- Slugfest 01
- Slugfest 01
- Slugfest 01
Brawl Stars Middle Management Guide: Introduction
The Brawl Stars Middle Management map is a dynamic and strategic battlefield that requires careful planning, quick thinking, and excellent teamwork. With its mix of open areas, obstacles, and chokepoints, the map offers both opportunities and challenges for players. The key to success lies in understanding the map’s flow, controlling key areas, and adapting to the ever-changing battlefield. Players need to be versatile, as the terrain demands a combination of offensive and defensive strategies. Whether you’re taking control of the central zone or using the map’s edges for strategic flanks, mastering Middle Management will help your team secure victory.
The central area of the Brawl Stars Middle Management map is often the focal point of the action, especially in modes where key objectives are located, such as gems or power-ups. This area is relatively open, but it is surrounded by walls, bushes, and other obstacles that can be used for cover. Contesting this central zone is crucial, but it also exposes players to risks. Teams must carefully balance between taking control of the center and defending against enemies trying to do the same. Properly timing your moves in and out of this area is essential, as overextending or leaving it too soon can give your opponents the advantage.
Around the edges of the Brawl Stars Middle Management map, there are multiple chokepoints and bushes that can be leveraged for surprise attacks or strategic retreats. These areas play a vital role in controlling the flow of the match. Teams with stealthy or fast brawlers can use these edges to set up ambushes, force opponents into awkward positions, or sneak past the center to capture objectives. However, these edges can also be dangerous, as enemies can use the same tactics against you. Players need to be mindful of their positioning along the sides, as a sudden attack from an unexpected angle can turn the tide of the game in an instant.
In conclusion, the Brawl Stars Middle Management map rewards players who can adapt to its constantly shifting dynamics. Successful teams must communicate well, control key areas, and adjust their tactics as the game unfolds. Understanding how to effectively use both the central area and the edges, and knowing when to be aggressive versus when to defend, will give your team a significant advantage. By mastering the flow of the map and using terrain features to your advantage, you can consistently outsmart your opponents and lead your team to victory.
Brawl Stars Middle Management Guide: Map Layout
Brawl Stars Middle Management is characterized by its open spaces in the center, making it the focal point of most battles. The central zone is often where objectives lie, such as gems, power cubes, or other game-specific targets, making it crucial for both teams to contest. Surrounding this open area are various obstacles and walls that provide cover for brawlers. These can be used to block enemy shots and create ambushes. The map also has narrow corridors or chokepoints that lead into the central area. These chokepoints play a critical role in controlling the map as they offer strategic advantages for both offense and defense. Teams that control these pathways can limit enemy movement and apply pressure.
Around the edges of the Brawl Stars Middle Management map, there are bushes, ramps, and other terrain elements that can be used for flanking or providing cover for more stealthy brawlers. These edges often serve as areas where players can regroup or plan surprise attacks. However, players must be cautious here, as they may be exposed to enemy fire if not well-hidden. The balanced symmetry of the map means both teams have equal access to these areas, and therefore, positioning is vital.
The central area of the Brawl Stars Middle Management map should be the focal point for most brawlers. Whether you’re aiming to collect objectives or control the middle, this area is where the action happens. Tanky brawlers like Bull or El Primo excel here as they can absorb damage and control key points with their large health pools. Ranged brawlers like Penny, Barley, or Rico are also effective in this area, where they can use obstacles for cover and deal damage from a distance. The central area is dynamic, and its control shifts constantly, requiring brawlers to adapt quickly to the enemy’s movements.
The chokepoints leading into the central area are equally important. These areas can be used to cut off enemy advancement, and controlling them can help your team apply pressure. Brawlers like Tara or Frank are great at holding these chokepoints thanks to their crowd control abilities, which can stop enemies from moving forward. These points also offer opportunities for ambushes, as opponents who try to pass through without careful attention could easily be trapped.
Brawl Stars Middle Management Guide: Best Brawlers
The Brawl Stars Middle Management map is all about controlling key areas and adapting quickly to the shifting dynamics of the battle. Whether you’re focused on holding the central zone, applying pressure from the edges, or utilizing cover for a surprise attack, the best brawlers for this map can take advantage of the terrain and adjust their playstyle based on the evolving match.
Tanky Brawlers

Tanky brawlers like El Primo, Bull, and Frank are fantastic choices for holding down the central zone and chokepoints. These brawlers are built to soak up damage, making them ideal for taking the brunt of enemy attacks while keeping key areas under control. El Primo and Bull are especially useful in the open central spaces, where their ability to close the gap on enemies and disrupt enemy positions can easily force opponents into unfavorable spots. Frank’s ability to stun enemies with his super also makes him a great asset in tight situations, providing your team with a much-needed edge in controlling crucial choke points.
Ranged Brawlers

On the other hand, ranged brawlers like Barley, Penny and Rico can excel in dealing consistent damage from a distance, especially when positioned behind cover. The Brawl Stars Middle Management map’s blend of open spaces and strategic cover is perfect for these brawlers, as they can fire over obstacles while staying safe. Penny’s splash damage from her mortar can disrupt enemy formations, especially in choke points, while Barley can control areas and force enemies out of their hiding spots with his area-of-effect attacks. Rico’s ability to bounce shots off walls can be extremely useful in the central area or in narrow corridors, providing consistent pressure without exposing himself to too much danger.
Mobile Brawlers
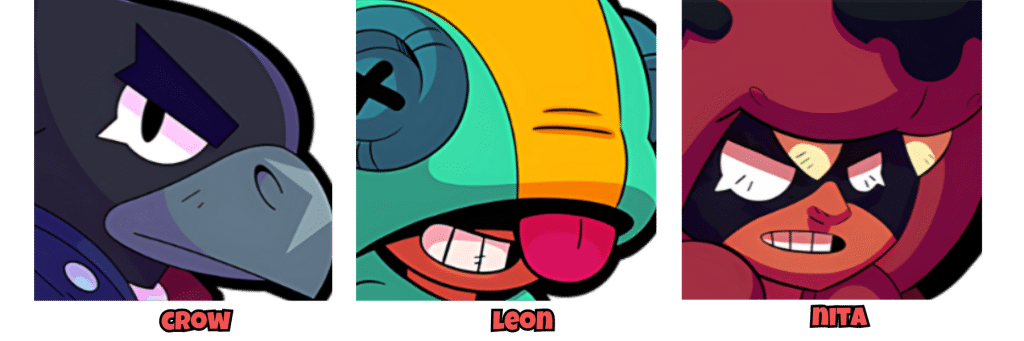
For mobility and surprise tactics, Leon, Crow, and Nita are excellent picks. These brawlers can quickly move between the central area and the map’s edges, making them versatile and capable of applying pressure wherever needed. Leon can sneak up on enemies with his invisibility, making him ideal for catching opponents off-guard or stealing objectives when the enemy least expects it. Crow’s poison not only disrupts enemy brawlers but also allows him to harass enemies from a distance while avoiding direct confrontations. Nita’s bear is a great tool for creating distractions and applying pressure, especially when combined with her mobility. All of these brawlers thrive on the map’s bushes, using them as cover for surprise flanks or retreating when necessary.
In conclusion, the best brawlers for Brawl Stars Middle Management are those that can balance between holding key areas, dealing consistent damage, and quickly reacting to changes in the game. A team with a solid mix of tanky brawlers, ranged attackers, and mobile disruptors will give you the flexibility to control the center, dominate the edges, and outmaneuver your opponents.
Brawl Stars Middle Management Guide: Treasure Hunt
Treasure Hunt on the Brawl Stars Middle Management map is a highly strategic mode that tests your team’s coordination and adaptability. The central area, where the treasure is located, serves as the primary battleground, and controlling this area is crucial. Tanky brawlers like El Primo or Frank are well-suited to hold the middle ground, absorbing damage while other teammates focus on securing the treasure. However, the center is constantly contested, so positioning, timing, and teamwork are vital for maintaining control.
While the center is essential, the edges of the Brawl Stars Middle Management map can also play a significant role in the success of your team. Stealthy brawlers like Leon and Crow excel in these areas, using the bushes to hide and maneuver around enemy lines. By sneaking past opponents who are too focused on the center, these brawlers can steal the enemy’s treasure or create confusion, forcing the opposing team to split their attention. Properly timing a flank can disrupt the enemy’s strategy and provide a crucial advantage.
Chokepoints scattered around the Brawl Stars Middle Management map are another critical element in Treasure Hunt. These narrow passages can be used to control the flow of the game, especially when defending the treasure or trying to block an enemy push. Brawlers with strong offensive capabilities, such as Bull or El Primo, are excellent at holding these chokepoints, preventing enemies from entering the central area or stealing the treasure. Teamwork is essential here—while tanky brawlers hold the chokepoints, ranged attackers can provide support and deal damage from a distance.
Ultimately, flexibility and adaptability are key to success in Treasure Hunt. If your team loses control of the center, retreating to the edges and regrouping before launching a counterattack can turn the game in your favor. Likewise, if you have control of the center, maintaining it while watching for enemy flanks is crucial. By effectively balancing offense and defense, coordinating with your team, and adjusting tactics based on the flow of the match, your team can secure the treasure and emerge victorious.
Brawl Stars Middle Management Guide: Strategies Tips

To succeed on the Brawl Stars Middle Management map, controlling the center should always be a priority, but it’s important not to neglect the edges of the map. The layout encourages a balance of offensive and defensive plays, and optimizing your strategy requires both careful planning and adaptability. Here’s how to make the most of the map’s features and ensure your team’s success:
⭐ Control Chokepoints: The narrow corridors and chokepoints leading into the central area are critical for controlling the flow of the match. These points provide a natural barrier for both teams, and controlling them can provide a significant tactical advantage. High-damage brawlers, such as Bull or Frank, are perfect for locking down these areas. Their ability to take hits and dish out substantial damage makes it difficult for enemies to push through. Tanky brawlers can stand guard at these chokepoints and prevent enemy advances, while ranged brawlers can assist from behind, providing support and dealing damage to any enemies trying to push through. By effectively controlling chokepoints, you can limit your opponents’ mobility and force them into less favorable positions.
⭐ Use Cover Effectively: The Brawl Stars Middle Management map is filled with obstacles and cover that provide valuable protection. Always use these to your advantage—whether it’s hiding behind a wall, using bushes for ambushes, or taking a quick moment to reposition. Ranged brawlers like Penny and Barley excel at using cover to keep their distance while dealing significant damage. Mobile brawlers such as Leon and Nita can reposition behind cover and surprise enemies from unexpected angles. Proper cover usage lets your team control key areas while minimizing damage. Stay aware of your positioning to avoid getting caught off-guard.
⭐ Edge Play and Flanking: While the central area of Brawl Stars Middle Management is crucial, the edges can often turn the tide of the match. Stealthy brawlers like Leon and Crow excel in these areas, using the flanks to catch enemies off-guard. When the enemy focuses too much on the center, their flanks become vulnerable. Capitalizing on this can disrupt their strategy and create confusion. Coordinate with your team to push or retreat, and use the cover along the edges to maneuver quickly. Flanking forces enemies to split their attention, weakening their control over key areas and creating a powerful advantage when executed properly.
⭐ Adapt to the Flow of the Game: The Brawl Stars Middle Management map is dynamic, and being able to adapt to the shifting conditions is crucial. As the match progresses, the control of the center can change hands multiple times, and you need to be ready to adjust your tactics accordingly. If your team has control of the center, consider setting traps at chokepoints to catch enemies off guard or punish them when they attempt to take back control. If the enemy controls the center, don’t panic—shift your focus to flanking, using cover, and creating distractions. Communication and flexibility are key, as every moment on the map can change the flow of the match.
⭐ Communication and Teamwork: Since Brawl Stars Middle Management heavily relies on positioning, communication and teamwork are essential. Whether you’re holding the center, flanking, or supporting teammates, working together as a unit will make all the difference. Keep an eye on your teammates’ positions and coordinate your actions, whether it’s defending a chokepoint or pushing for objectives. Support roles, such as healers or defensive brawlers, should work in tandem with tanky brawlers to keep them alive and in the fight. If your team is spread out, it’s vital to communicate to avoid getting caught in unfavorable positions or overwhelmed by the enemy. Team coordination allows you to maintain map control, secure key objectives, and outmaneuver your opponents.
Brawl Stars Middle Management Guide: Conclusion
Mastering the Brawl Stars Middle Management map requires more than just individual skill—it’s about understanding the map’s layout, utilizing its features effectively, and coordinating with your team. The central area plays a critical role in most matches, but success is often determined by how well you control the surrounding areas, manage chokepoints, and take advantage of cover. Whether you’re pushing into the center or holding down the edges, maintaining a balanced approach between offense and defense is key. Tanky brawlers may thrive in the heart of the action, but ranged and stealthy brawlers can excel on the flanks, providing much-needed support or disrupting enemy plans.
As the match progresses, being able to adapt to the ever-changing flow of battle is crucial. Situations can shift quickly, and it’s important to adjust your strategy based on the enemy’s movements and the state of the map. For example, if your team loses control of the center, retreating to regroup and launching a counteroffensive from the edges can give you the upper hand. Conversely, if you hold the center, defending it while preventing enemy flanks is vital to maintain control. Being flexible and ready to change tactics is a significant factor in determining victory on this map.
With enough practice, you’ll begin to instinctively understand the Brawl Stars Middle Management map’s rhythms, the best times to be aggressive, and when to fall back. Each match provides an opportunity to refine your approach and become more strategic. Over time, you’ll not only master the Brawl Stars Middle Management map but also become a formidable force in Brawl Stars, able to outsmart and outplay opponents with ease. With careful planning and execution, your team will be well on its way to securing consistent wins.

